The best soil to grow plants in is one that drains well, holds enough moisture to stay consistently damp (not wet), has plenty of organic matter, sits at the right pH for your specific plants, and leaves enough air space around the roots to let them breathe. That's the short answer. But the practical answer depends on whether you're growing in the ground, in pots, in raised beds, or in a hydroponic setup, because the right mix looks different in each case, and what works beautifully for tomatoes in a raised bed will suffocate herbs in a small container.
Best Soil to Grow Plants: How to Choose and Amend It
Marcus Holloway
24 Mar 2026

This guide walks you through what makes soil perform well, how to figure out what you're actually working with right now, and exactly how to fix or replace it. Whether you're a beginner trying to stop killing plants or an experienced grower dialing in a specific medium, you'll leave here with a clear plan.
What 'best soil' actually means for plant growth
There's no single magic soil product. What makes soil 'best' is a combination of physical structure, chemistry, and biology working together. When those three are in balance, plants grow fast, roots spread easily, water and nutrients move efficiently, and you deal with fewer disease problems. When even one is off, everything else suffers.
Texture and structure
Soil texture refers to the ratio of sand, silt, and clay particles. The ideal growing medium is loam, which is roughly 40% sand, 40% silt, and 20% clay. Loam drains excess water quickly but still holds enough moisture and nutrients to feed roots between waterings. Pure sand drains so fast it can't hold nutrients. Pure clay holds water so tightly roots drown and compact. Most real-world soils fall somewhere between these extremes, which is why amendment is almost always part of the picture.
Drainage and aeration
Roots need oxygen just as much as they need water. A well-aerated soil drains excess water within a few hours and refills those pore spaces with air. The general target is around 25–30% air porosity in a healthy growing medium. If water is still pooling on the surface or in a container 12–24 hours after watering, you have a drainage problem, and roots are sitting in an anaerobic zone where they'll rot and suffocate.
Organic matter
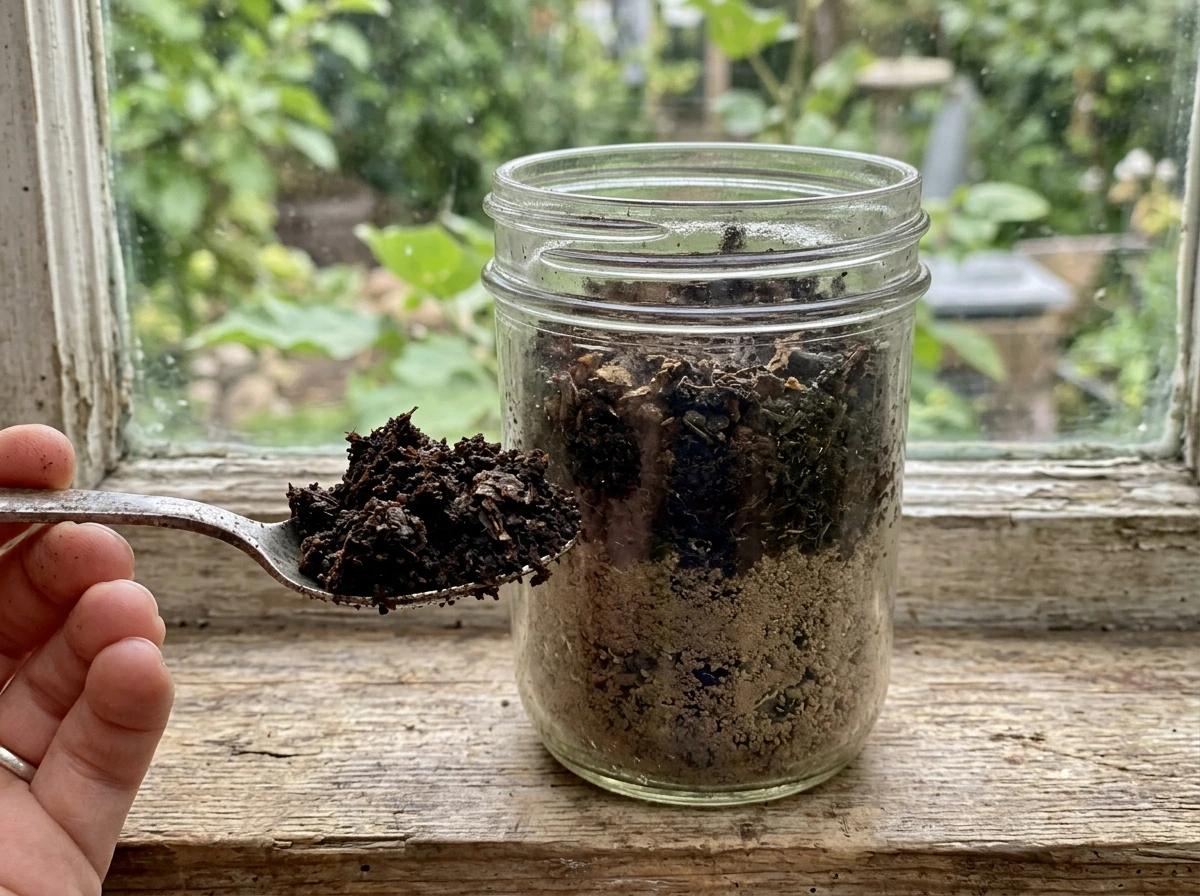
Organic matter is the engine of healthy soil. It feeds the microbial life that breaks nutrients into plant-available forms, improves both water retention and drainage simultaneously, and builds soil structure over time. A good garden soil has at least 3–5% organic matter by weight. Most native soils are below this, especially in urban yards or newly built properties where topsoil has been stripped.
pH: the chemistry layer
pH controls which nutrients are chemically available to roots, regardless of how much you've added to the soil. Most cultivated plants, including vegetables, fruits, flowers, and most herbs, perform best in a pH range of 6.0 to 6.8. University of New Hampshire Extension research confirms this range covers grains, fruit, vegetables, flowers, and turf. For vegetables specifically, UConn Extension puts the optimal target at 6.5, while Oregon State University Extension warns that anything above 7.5 is too alkaline for most vegetable crops. Below 6.0, nutrients like phosphorus and calcium become locked out. Above 7.5, iron and manganese become unavailable, and you'll see yellowing even in well-fertilized plants.
Nutrients and biology
Good soil contains a baseline of nitrogen (N), phosphorus (P), and potassium (K), plus a range of micronutrients. But equally important is the microbial ecosystem in the soil: bacteria, fungi, and other organisms that cycle nutrients, suppress pathogens, and build structure. Overuse of synthetic fertilizers and pesticides depletes this biology. Compost, cover crops, and reduced tillage rebuild it.
How to figure out what soil you're working with right now
Before you buy anything or add any amendments, spend 20 minutes actually looking at what you have. Most soil problems are visible or testable with basic tools.
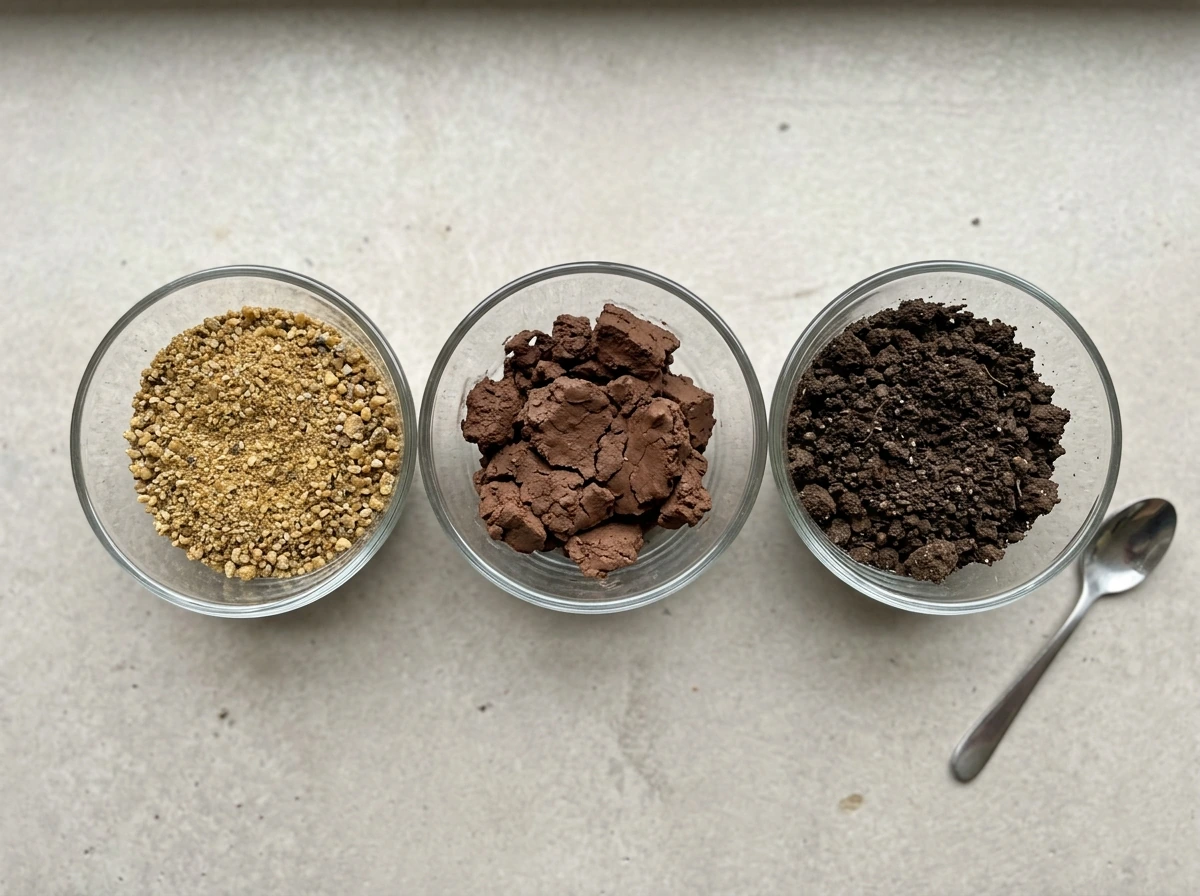
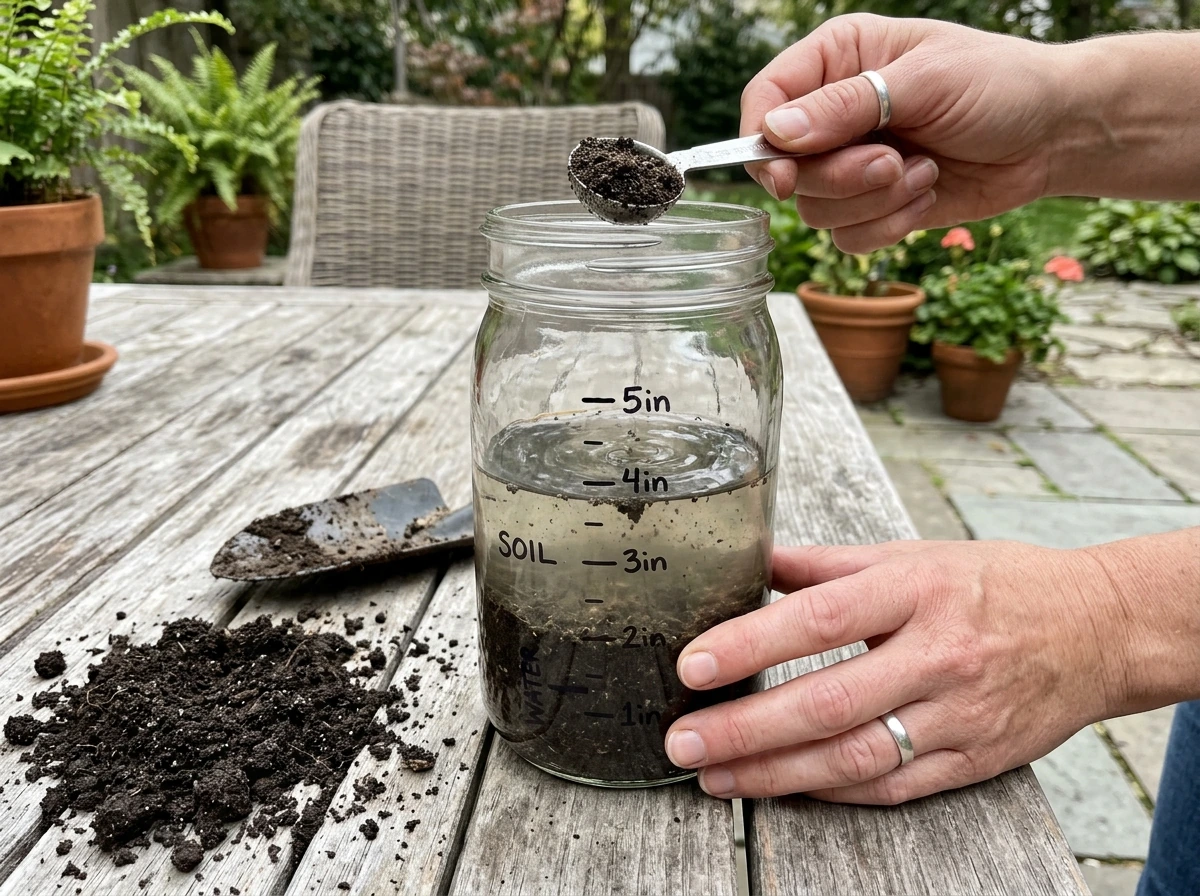
The jar test (texture)
Fill a clear jar about one-third with your soil, top it up with water, shake it hard for 60 seconds, then let it settle for 24–48 hours. Sand settles to the bottom first (within a minute), silt settles in the middle layer, and clay either settles very slowly on top or stays suspended, making the water cloudy. The ratio of those visible layers tells you your soil texture. If the bottom sand layer is very thick and there's almost no middle layer, you have sandy soil. If everything stays murky for days, it's very high in clay.
The squeeze and ribbon test (clay content)
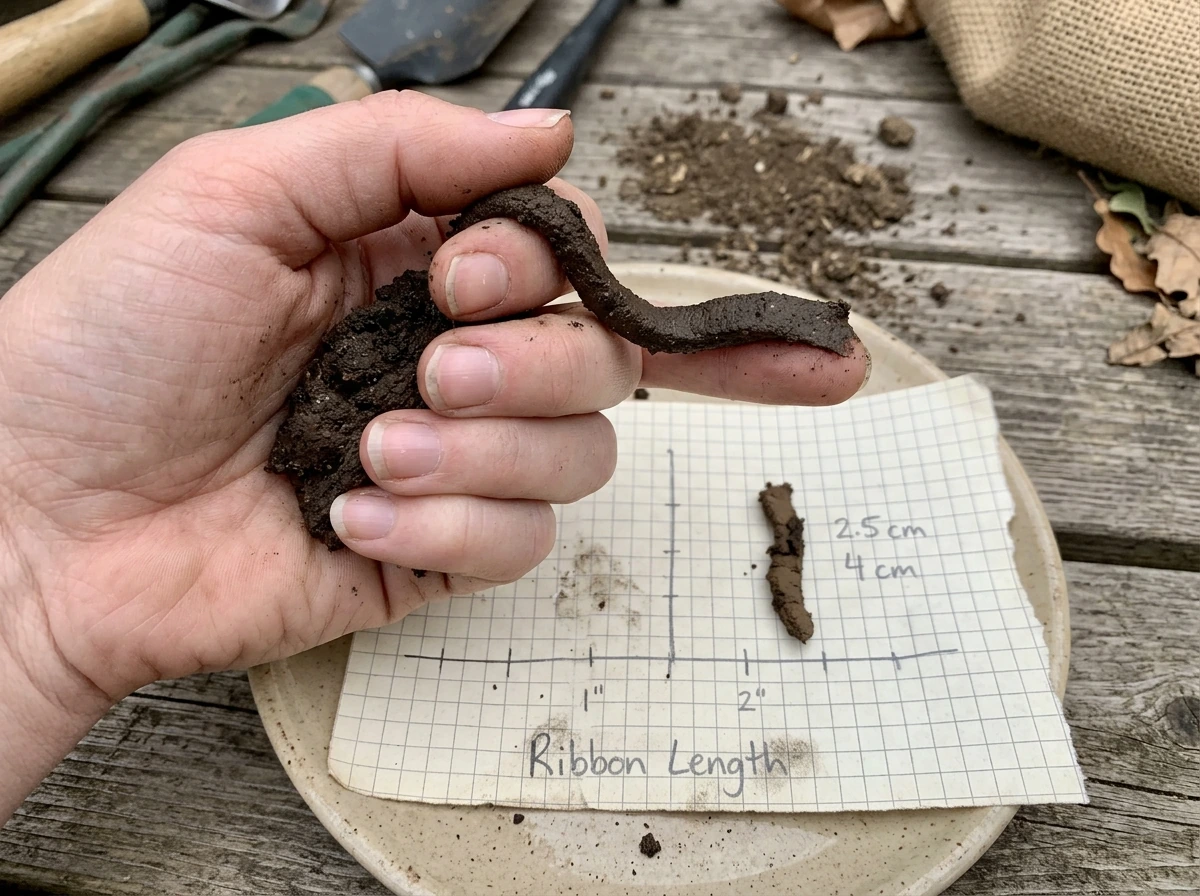
Grab a handful of moist (not soaking) soil and squeeze it into a ball. Then press it between your thumb and finger to push out a ribbon. If the ribbon is long (more than 2 inches) and smooth, you have high clay content. If it barely holds together and falls apart, you're on the sandy side. A soil that holds a ball but crumbles when poked is close to loam, that's a good sign.
The drainage test
Dig a hole about 12 inches deep and 12 inches wide. Fill it with water and let it drain completely, then fill it again and time how long the second fill takes to drain. Well-draining soil empties in 1–3 hours. If it takes longer than 6–8 hours, you have a drainage issue that needs addressing before you plant.
pH testing
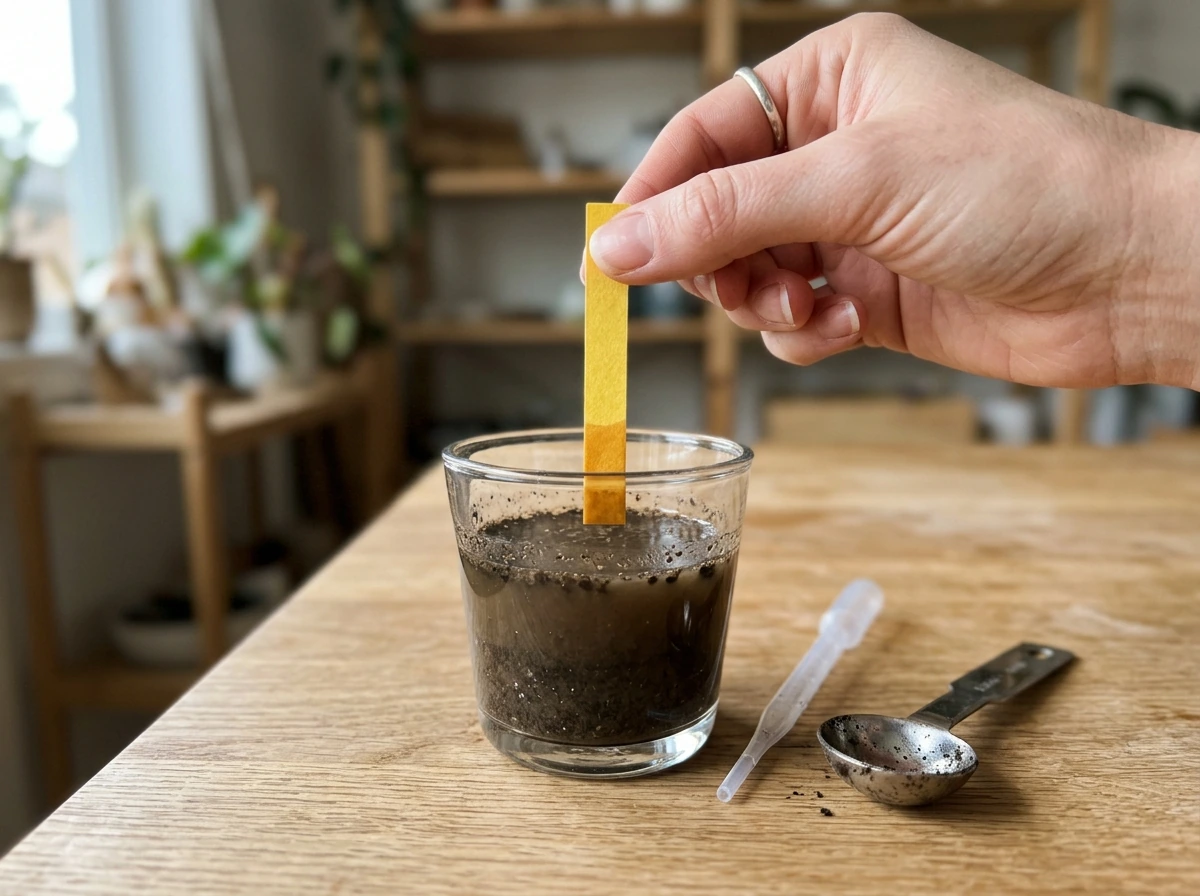
A basic pH meter or pH test strip kit costs under $15 and gives you a usable reading in minutes. For a rough free check: pour a little white vinegar on dry soil. If it fizzes, the soil is alkaline (above 7.0). Mix wet soil with baking soda, if it fizzes, it's acidic (below 6.0). These DIY tricks are rough indicators. For anything more precise, a digital pH meter or a mail-in lab test is the better investment. Soil test kits (like the MySoil kit, which is referenced in related guides on this site) give you pH plus macronutrient levels in a single test and are worth running at least once per season if you grow in-ground.
When to use a lab test
If your plants consistently underperform despite regular watering and fertilizing, get a proper lab test. Your local cooperative extension service often offers these for $15–$30 and returns results that include pH, organic matter percentage, and macronutrient levels with specific amendment recommendations. That's a much better starting point than guessing.
Soil conditions that reliably kill plant growth
Most growers don't fail because they used the wrong fertilizer. They fail because the underlying soil conditions make it impossible for any fertilizer to work. Here are the failure types I see most often.
- Heavy clay: water sits on top or moves so slowly through the profile that roots are constantly oxygen-deprived. Plants look overwatered even when you're watering normally. Root rot, yellowing, and stunted growth are the signature symptoms.
- Overly sandy soil: water drains so fast nutrients leach out before roots can absorb them. Plants look deficient and dry out within hours of watering, no matter how much you feed them.
- Compacted soil: whether from foot traffic, heavy machinery, or just years of neglect, compacted soil has crushed pore spaces. Roots can't penetrate, water pools on the surface, and even earthworms disappear. You can test this with a screwdriver — if you can't push it 6 inches into moist soil with moderate pressure, it's compacted.
- Waterlogged or poorly drained soil: chronic wet conditions destroy root systems within days in most plants. This often happens in low spots, heavy clay, or containers without drainage holes.
- Wrong pH: pH outside the 6.0–6.8 range for most plants locks out specific nutrients chemically. You can add all the fertilizer you want and still see yellowing, brown leaf edges, or poor fruit set because the nutrients are present but unavailable.
- Nutrient-depleted or dead soil: soil that's been repeatedly tilled, covered in concrete or construction debris, or repeatedly blasted with synthetic inputs can lose its biological activity. Without microbial life, even nutrient-rich soil underperforms.
- High salinity: over-fertilized soils or soils in arid regions can build up salt concentrations that pull water out of roots by osmosis, causing wilting even in moist conditions. You'll see white crusty deposits on soil surfaces or container rims.
Choosing the right soil mix for your specific setup
This is where the practical decisions happen. The 'best soil' is different depending on how and where you're growing. What works in the ground is usually wrong for a pot, and what works for a large raised bed is overkill for a windowsill herb container.
In-ground growing
If you're growing directly in native soil, your job is amendment rather than replacement. Start with your texture and pH tests so you can get the best soil to grow flowers in. Most in-ground garden beds benefit enormously from 2–4 inches of compost tilled in annually, which improves both clay and sandy soils simultaneously. For pH, you'll likely need to add lime to raise it or sulfur to lower it (more detail on this in the amendments section below). In-ground growers have the advantage of a larger root zone and more stable moisture, but they're also stuck with whatever native soil problems exist.
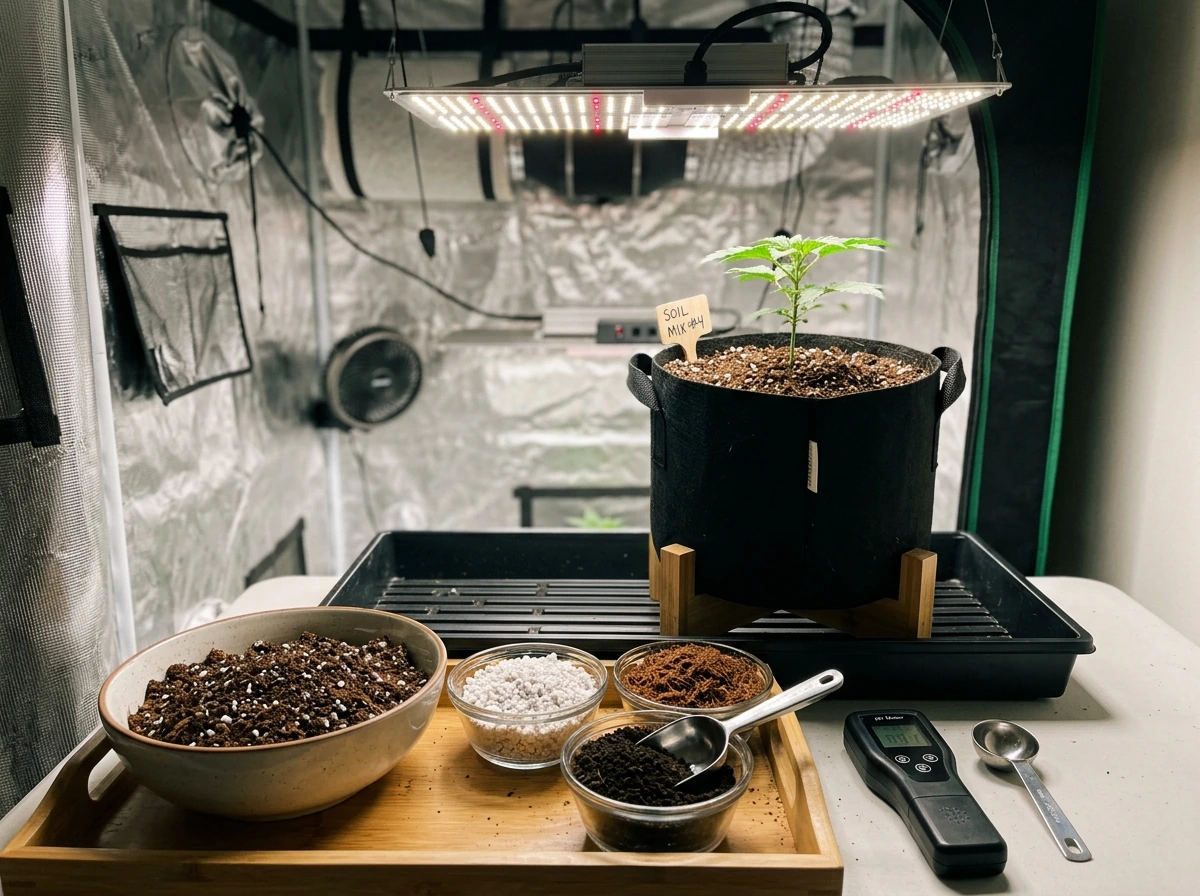
Container growing
Never use straight garden soil or native soil in containers. It compacts in pots, drainage fails, and roots get strangled. A good container mix is typically a blend of high-quality potting soil, perlite, and sometimes coco coir. A practical starting ratio is 60% quality potting mix, 30% perlite, and 10% worm castings or compost. This gives you drainage, aeration, and a slow-release organic nutrient base. Container soil also needs to be replaced or heavily refreshed every growing season because it breaks down and loses its structure over time.
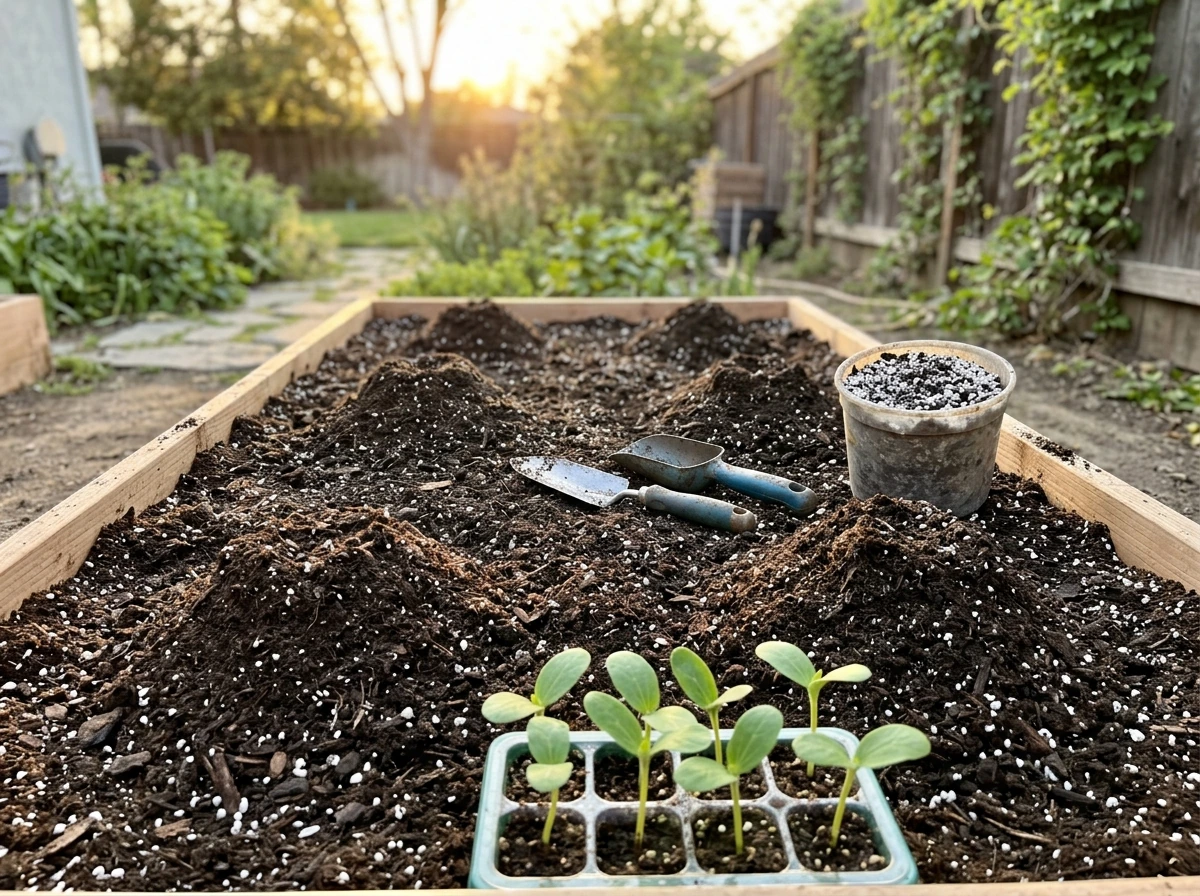
Raised beds
Raised beds give you the most control because you're building the entire growing profile from scratch. The classic Mel's Mix formula (equal parts compost, peat moss or coco coir, and perlite or coarse vermiculite) remains one of the most reliable starting points for raised beds. For a more nutrient-rich blend suited to heavy feeders like tomatoes and cannabis, many growers use a mix of 40% quality topsoil or compost-heavy base, 30% perlite, 20% worm castings, and 10% coco coir. For a more nutrient-rich blend suited to heavy feeders like tomatoes and cannabis, many growers use a mix of 40% quality topsoil or compost-heavy base, 30% perlite, 20% worm castings, and 10% coco coir. This kind of custom blend is also what most experienced growers discuss in our dedicated guides on the best grow soil and best soil for indoor and outdoor setups.
| Setup | Recommended Base Medium | Key Additions | Avoid |
|---|---|---|---|
| In-ground | Native soil (amended) | 2–4 inches compost, pH adjusters | Tilling too deeply, ignoring drainage |
| Containers | Quality potting mix | 30% perlite, 10% worm castings | Garden/native soil, no-drain containers |
| Raised beds | Compost-heavy blend | Perlite, coco coir, worm castings | Pure topsoil, heavy clay fill |
| Hydroponics/soilless | No soil | Coco coir, rockwool, clay pebbles | Any soil-based medium in hydro systems |
How to fix poor soil step by step

Once you know what's wrong with your soil, here's how to actually fix it. Work through these in order because drainage and aeration problems need to be solved before pH adjustment, and pH needs to be stable before fertilizing makes sense.
- Fix drainage first: if your soil drains slowly (more than 4 hours to empty the drainage test hole), you have two options. For in-ground beds, add 3–4 inches of coarse sand and 3–4 inches of compost tilled in together to break up clay structure. Never add sand alone to clay — it makes cement. For containers, empty them, add perlite to reach at least 25–30% of the total mix, and ensure drain holes are clear and large enough.
- Improve aeration in compacted soil: for compacted in-ground beds, use a garden fork or broadfork to loosen the top 12 inches without fully inverting the soil profile. This preserves soil structure and microbial networks while opening up pore spaces. Avoid rototilling repeatedly — it destroys structure and brings weed seeds to the surface.
- Add organic matter: work in 2–4 inches of finished compost for in-ground beds, or mix worm castings or compost into your container and raised bed media. Organic matter is the single most universally helpful amendment. It improves drainage in clay, improves water retention in sand, feeds soil biology, and adds slow-release nutrients simultaneously.
- Adjust pH if needed: if your test shows pH below 6.0, apply garden lime (calcium carbonate) at the rate recommended on the package for your soil type — typically 5–10 lbs per 100 square feet for moderately acidic soil. Work it into the top 6 inches and retest after 2–4 weeks. If pH is above 7.0–7.5, apply elemental sulfur, which acidifies soil slowly. At rates of around 1–2 lbs per 100 square feet for sandy soil and 2–4 lbs per 100 square feet for clay. Sulfur works slowly, so apply it 4–6 weeks before planting and retest. For containers, pH-adjusting your water (if using a well or if municipal water is alkaline) is often faster and more precise.
- Feed the biology: once structure and pH are dialed in, add biology back with a quality compost tea, a mycorrhizal inoculant applied at planting, or simply a 1-inch compost top-dress every 4–6 weeks through the growing season. This is the step most growers skip, and it's the difference between soil that's chemically correct and soil that actually performs.
- Mulch the surface: after planting, apply 2–3 inches of organic mulch (straw, wood chips, or shredded leaves) over the soil surface. This suppresses weeds, reduces moisture evaporation, moderates soil temperature, and adds organic matter as it breaks down. It's one of the lowest-effort, highest-impact things you can do for soil health.
Where hydroponics and soilless media fit into this
If you're growing hydroponically, soil quality is simply not part of the equation, and confusing the two will send you down the wrong research path. Hydroponic systems replace soil entirely with a nutrient solution that's delivered directly to roots. The 'medium' in hydroponics (if there is one) is a support structure, not a growing medium in the traditional sense. It doesn't need to feed the plant or manage pH the same way soil does.
Common soilless media and what they do
The most widely used soilless growing media each have distinct properties that make them suited to different hydroponic or hybrid setups.
- Coco coir: made from compressed coconut husk fiber. It has excellent water retention and aeration, a near-neutral pH (5.8–6.5), and a natural resistance to some pathogens. Coco is technically a soilless medium but is often used in hybrid soil/coco blends, especially for cannabis. It's inert, meaning it adds no nutrients — you feed entirely through your nutrient solution.
- Rockwool (mineral wool): spun volcanic rock fibers that hold water and air very well. Commonly used for germination and as a hydroponic medium in NFT and DWC systems. Rinse thoroughly before use as it starts alkaline, around pH 7.0–7.5.
- Clay pebbles (hydroton/LECA): lightweight expanded clay aggregate that's extremely porous and pH-neutral. Used as a hydroponic medium in flood-and-drain, drip, and Dutch bucket systems. Provides excellent oxygen to roots but little water retention, so system design matters.
- Perlite: volcanic glass puffed by heat into lightweight white particles. Often used as a standalone hydroponic medium in drip systems or as a soil/coco amendment for drainage. It's pH-neutral and adds no nutrients.
- Vermiculite: similar to perlite but holds more water and some cation exchange capacity. Suited for seed starting and germination media, often blended with perlite and coco in starter mixes.
Soil vs. soilless: which path is right for you
If you're growing outdoors, in raised beds, or in containers indoors, you're almost certainly working with soil or a soil-based mix, and everything above applies directly. If you're setting up an indoor grow room with a recirculating system, timed nutrient delivery, and a controlled environment, soilless or full hydro makes more sense because it gives you precise nutrient control, faster growth, and eliminates soil-borne pests and pathogens. The tradeoff is cost, complexity, and the need for daily system monitoring. Soil is more forgiving for beginners and requires less infrastructure. Hydroponics rewards experience and rewards it fast, growth rates in well-run hydro systems are often 30–50% faster than in soil for the same plant.
A useful middle ground, especially for indoor growers who want some of the control of hydroponics without full system complexity, is a coco coir and perlite blend fed with a diluted nutrient solution on a manual or automated schedule. This is technically a soilless grow, and it behaves differently from soil in terms of buffering and water retention, but it's significantly more accessible than a full recirculating DWC or NFT system.
Your practical next steps
Here's what to actually do today based on your situation. If you're working with in-ground soil: run the jar test and the drainage test this afternoon, pick up a pH meter if you don't have one, and order a bag of compost and garden lime or sulfur depending on your pH result. If you're in containers: check your current potting mix, replace anything that's compacting or holding water more than a day after watering, and rebuild your mix with a perlite-heavy ratio. If you're building a raised bed from scratch: use a compost-forward blend with perlite and coco, hit your pH target before you plant, and don't skip the mycorrhizal inoculant at planting time. And if you're eyeing hydroponics, start with coco and perlite with a simple hand-watered nutrient solution before investing in full recirculating equipment. Get your feeding schedule right on a simple medium first.
Most soil problems are fixable. The key is diagnosing before amending, because adding the wrong thing to already-problematic soil makes it worse, not better. Test first, fix in the right order, and give the biology time to establish. Healthy soil grows healthy plants consistently, and once you have it dialed in, maintaining it takes far less effort than fighting problems season after season.
FAQ
If my plants look chlorotic, can I fix it just by adding fertilizer or raising pH?
Measure pH and drainage first. If water takes too long to drain or you see anaerobic signs (stinky soil, persistently wet pockets), fixing pH alone will not help, you must improve aeration and structure first. Then adjust pH gradually (lime or sulfur), and retest after the amendment has had time to react, usually weeks rather than days.
How do I make my soil test results reliable so I do not amend the wrong thing?
Use the same garden or pot every time you test, same depth, and avoid testing after heavy amendments or fresh compost topdressing. Take multiple subsamples and mix them, because pH and texture can vary by spot (especially in beds with recent composting). For jar tests, use soil that is evenly moist but not dripping, otherwise layers can look misleading.
What container-mix problems are easy to miss if my plants still get fertilizer?
For containers, the biggest red flag is when water runs straight through at first and then the pot stays soggy after, or when the mix stays wet longer than a day. In that case, refresh the mix rather than only adding fertilizer, because compaction and loss of pore space prevent roots from getting oxygen even if nutrients are present.
Is compost always enough to make the best soil to grow plants?
Do not assume compost fixes everything. Compost improves structure and biology, but if your soil is very compacted or highly clayey, compost alone may not restore air porosity. In those cases, pair compost with an aeration-friendly amendment (like perlite or coarse organic material) and confirm drainage with the 1 to 3 hour drainage target.
Can I use regular topsoil or garden soil in pots if I add compost?
Yes, but “better” depends on context. Topsoil can be variable and sometimes brings in weed seeds or subsoil texture issues, while potting mix is usually pre-blended for consistent aeration and drainage. In-ground, you can use compost and amendments to correct native soil, but in pots, using straight garden topsoil almost always leads to compaction.
Should I fertilize before I correct pH and drainage?
Start with soil pH for your target range, then feed based on your test results. If pH is off (too acidic or too alkaline), nutrient availability and uptake can be poor even with correct fertilizer amounts, leading you to over-fertilize and then trigger salt buildup, especially in containers.
How much perlite should I add to containers, and what mistakes prevent it from working?
Mixing perlite into finished potting soil is generally safe, but do not bury it too deep in a way that creates channels or dry pockets. For long-term stability, choose perlite size appropriate to your system (more coarse helps maintain pore space) and plan to refresh container mix each season because breakdown of organics reduces air space over time.
Will mycorrhizal inoculant actually help in amended soil, and how should I apply it correctly?
If you want better roots in the long run, use mycorrhizal inoculant at planting as directed, but avoid applying high rates of phosphorus starter fertilizer that can reduce colonization. Also, do not let inoculated roots dry out during transplanting, keep them moist until planting.
When should I skip DIY tests and pay for a lab or extension soil test?
Yes. A jar test can show texture and drainage-related behavior, but it cannot tell you micronutrient availability or organic matter percentage well enough to guide amendments precisely. For anything beyond basic compost and general fertilizer, run a lab or cooperative extension test, especially when plants repeatedly fail despite “reasonable” care.
What symptoms suggest the soil problem is actually water penetration or uneven wetting?
If plants are growing fast early then suddenly stall, look for water dynamics first. Soil that drains “okay” might still have hydrophobic spots (repelling water) or inconsistent wetting in containers. In those cases, improving wetting and structure matters more than adding more fertilizer, and you may need to change or refresh the top layer rather than the entire volume immediately.
Do hydroponic setups need the same soil pH and soil testing as outdoor beds?
For hydroponics, you should not try to “soil test” the system medium the way you would soil. Instead, focus on nutrient solution pH, EC or nutrient concentration, dissolved oxygen, and how often the roots are exposed to solution or aeration, because those variables drive availability and uptake.
When is it better to replace container soil instead of amending it?
Rebuild rather than patch if the mix is repeatedly failing. If the container soil stays wet for 12 to 24 hours after watering, compacts hard, or has persistent root issues, topdressing rarely restores air porosity. Replace the mix, or at minimum remove and refresh the upper portion, then retest drainage behavior.