The best grow soil is not a single product you pull off a shelf. It is a combination of the right starting medium, physical structure, biology, and pH management that matches your specific plants and setup. Whether you are growing tomatoes on a patio, cannabis indoors under lights, or cut flowers in raised beds, the fundamentals are the same: roots need oxygen, consistent moisture, available nutrients, and a stable pH. Get those four things right and your soil works for you. Get them wrong and no amount of feeding or watering will save the crop.
Best Grow Soil Guide: Build Healthy Living Soil Fast
Marcus Holloway
24 Mar 2026

What 'best grow soil' actually means for your goals
The word 'best' changes completely depending on what you are growing and where you are growing it. A heavy loam that produces beautiful carrots in a raised outdoor bed would suffocate cannabis in a 5-gallon fabric pot indoors. So before you buy a bag or break ground, you need to answer two questions: What am I growing, and is it going indoors or outdoors?
Food crops and vegetables
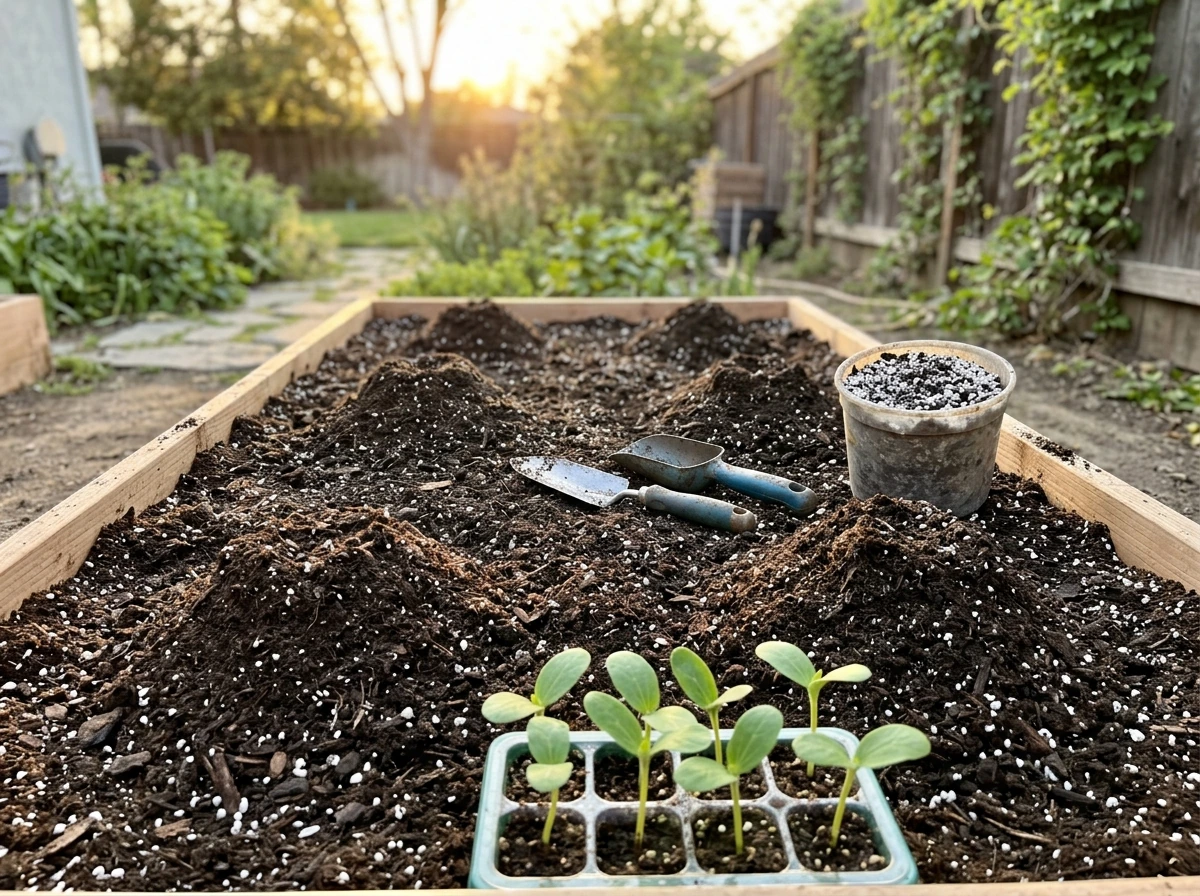
For vegetables, the target is a well-drained, deep mineral topsoil with relatively high organic matter. Think dark, crumbly, and alive. The University of Maryland Extension describes this profile as the gold standard for vegetable production, and it holds up in practice. You want the soil to hold moisture without becoming waterlogged, drain freely after heavy rain or irrigation, and have enough organic matter to feed the microbial life that makes nutrients available to roots. For outdoor beds, a soil test should drive any lime or fertilizer decisions before you plant. For containers growing food, skip garden soil entirely and build around a quality soilless base (more on that below).
Cannabis and hemp
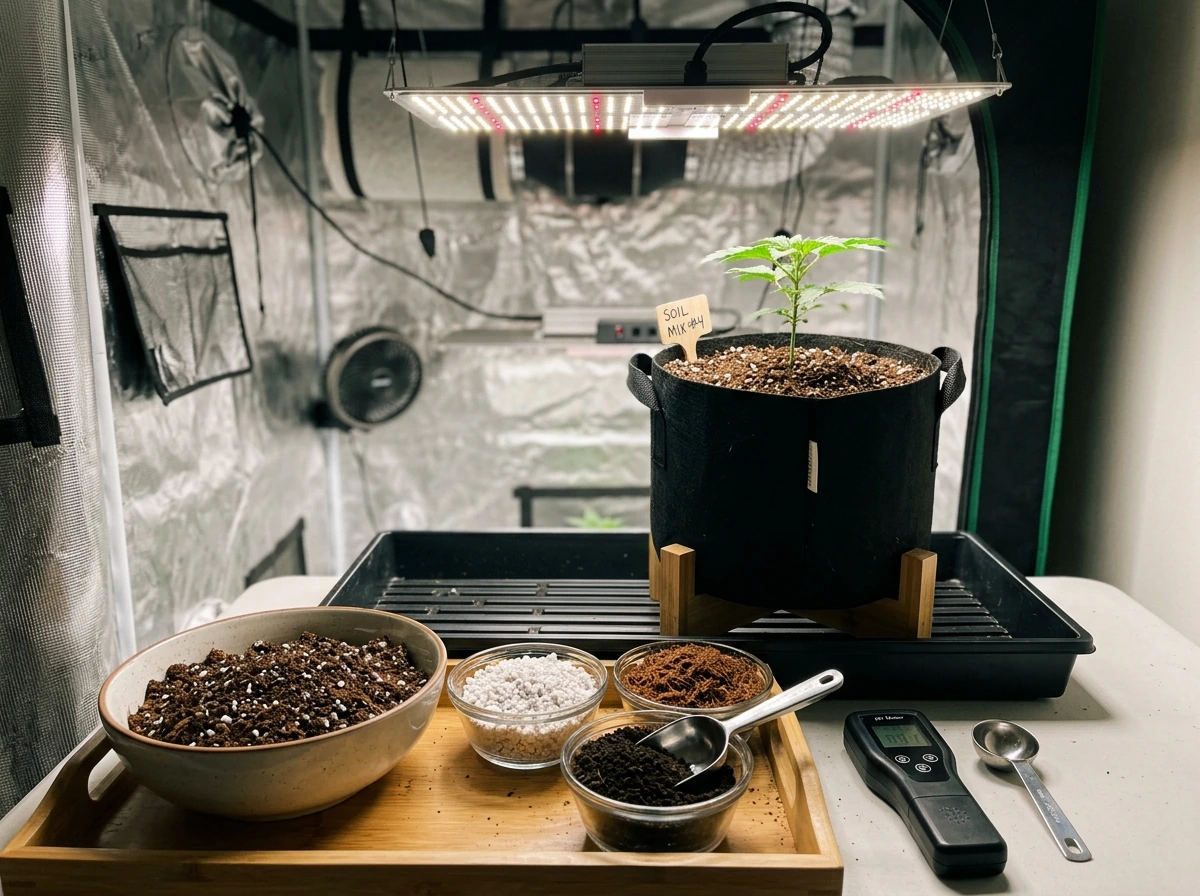
Cannabis is a heavier feeder and more pH-sensitive than most vegetables. Hemp and cannabis generally do best in soils with a pH between 6.0 and 7.0, with some substrate research from NCSU suggesting a tighter range of 5.8 to 6.2 for soilless cannabis grows. That tighter range matters because nutrient lockout at incorrect pH is one of the most common reasons cannabis growers see deficiency symptoms mid-grow. Indoor cannabis almost always performs better in a fast-draining, aerated soilless mix rather than true garden soil, and many experienced growers run it more like a controlled hydroponic system in terms of how carefully they monitor pH and EC. If you are looking for strain-specific soil recommendations, those live in the dedicated best grow soil for weed content on this site.
Flowers and ornamentals
Flower crops have a wider acceptable pH window, roughly 5.5 to 7.0 according to UMass Extension greenhouse and floriculture guidance, but pH still affects trace element availability and beneficial soil microorganism activity even in that range. For cut flowers and ornamentals grown in field soil, the priority is drainage and organic matter. For containers, you are back to a soilless mix. The best soil for outdoor grow setups and the best soil to grow flowers are covered in more depth in their own guides on this site, but the structural rules here apply to both. If you want to focus specifically on the best soil for outdoor grow, follow those recommendations alongside these pH and drainage principles. best soil to grow flowers
Indoor vs. outdoor: the core difference
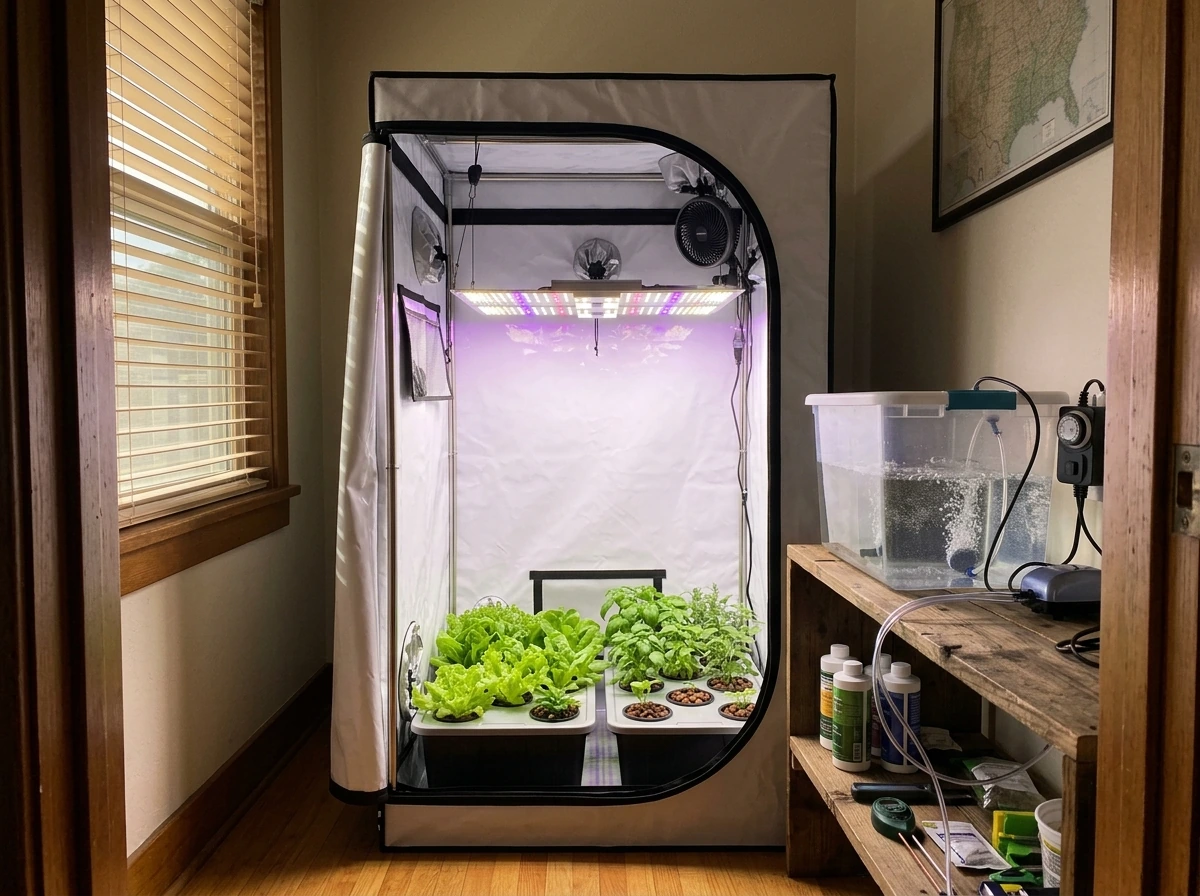
Outdoors, soil has buffer capacity. Rain leaches salts, earthworms aerate, and microbial populations self-regulate with the seasons. Indoors, you control everything and you are also responsible for everything. Containers dry out unevenly, salt builds up faster, and there is no natural drainage layer below. This is why indoor growers almost universally use soilless or amended potting mixes rather than digging up garden soil, and why pH and watering discipline matter so much more inside.
How to build living soil: compost, microbes, structure, and drainage
Living soil is not just dirt with fertilizer added. It is a biological system where bacteria, fungi, nematodes, and other microorganisms break down organic matter and convert it into plant-available nutrients continuously. Building it well from the start is faster than trying to fix a dead, compacted medium mid-grow.
Starting with quality compost
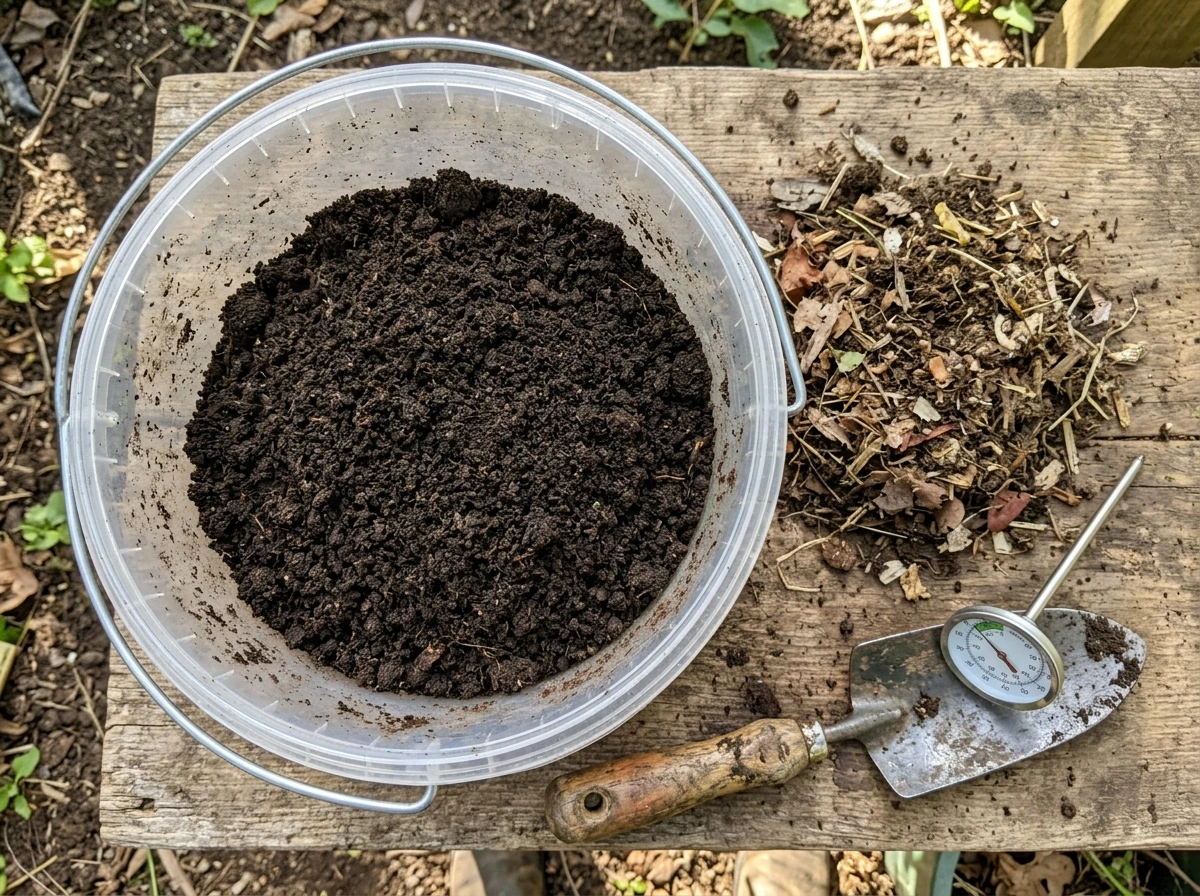
Not all compost is equal. WSU Tree Fruit research on compost quality gives a clear visual target: finished compost should be dark brown to nearly black, have an earthy smell (not ammonia or sulfur), show no recognizable original materials, and have a relatively porous, non-compacted texture. If your compost is chunky, smells off, or has visible food scraps, it is not finished and will cause problems in the root zone, including attracting fungus gnats. The carbon-to-nitrogen ratio of your compost feedstock matters too. UC IPM guidance puts the target at about 30:1 C:N for proper composting conditions. Too much nitrogen-heavy material (like fresh manure) and it heats erratically and stays wet. Too much carbon-heavy material (like wood chips) and it decomposes slowly.
One important caution from UMN Extension: avoid excess animal-based composts and manure because they tend to be high in phosphorus and calcium, which throws off your overall nutrient balance. A little well-finished herbivore manure compost is beneficial, but UC Master Gardeners recommend composting those manures separately first before incorporating them, to reduce pathogen risks. Never add meat, dairy, or manure from carnivores to your compost pile.
Microbial inoculants and biology
Mycorrhizal fungi and beneficial bacteria colonize root zones and help plants access water and nutrients that roots cannot reach on their own. You can introduce them by top-dressing with worm castings, adding compost teas, or using bagged mycorrhizal inoculant products at transplant time. The biology establishes fastest when the soil pH is in range (roughly 6.0 to 7.0 for most beneficial organisms), the soil is not sterilized with harsh fungicides, and organic matter is present as food for the microbial community.
Physical structure: aeration and drainage
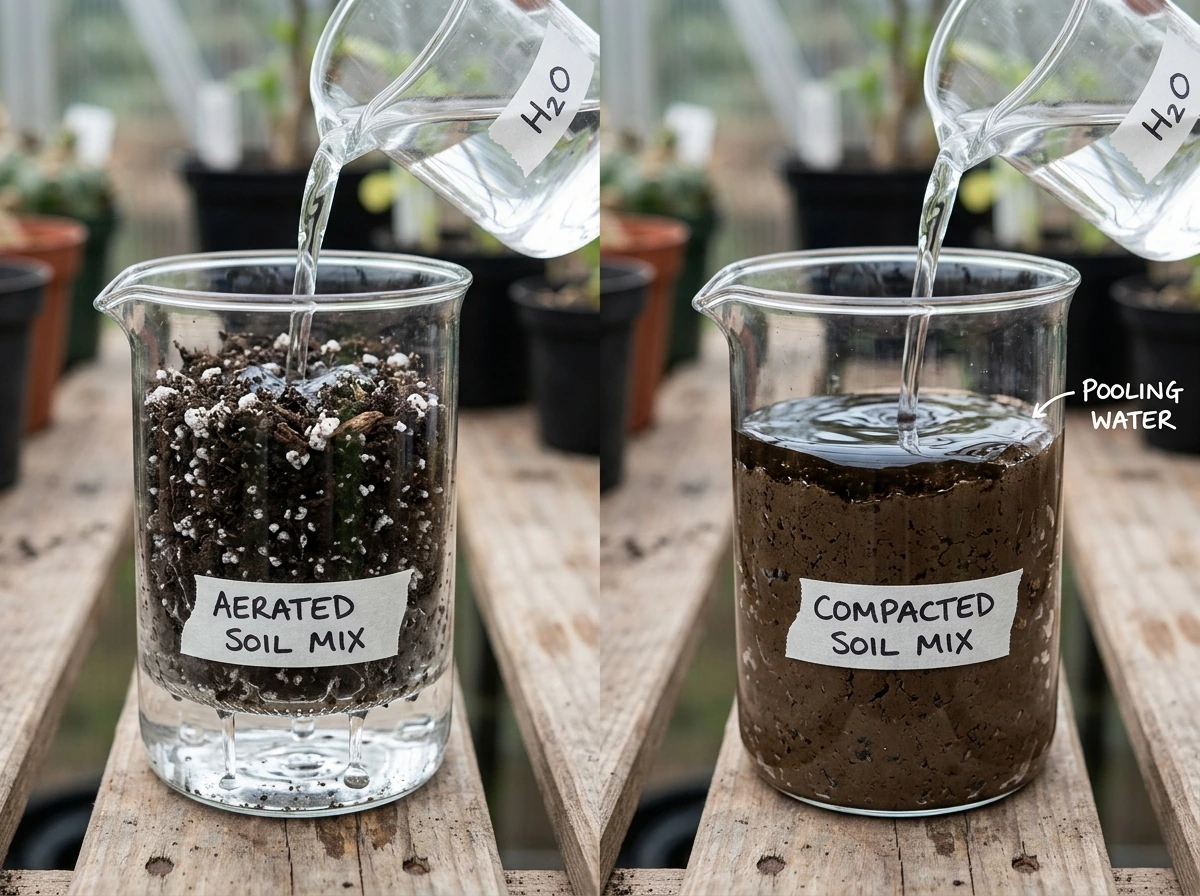
Even perfect compost and great biology fail if the physical structure is wrong. Soil that compacts or stays waterlogged starves roots of oxygen, and UC IPM describes this oxygen deficit as potentially life-threatening for plants through a process called root asphyxiation. The fix is mechanical: open up the texture with amendments that create air pockets and improve drainage. The most practical options from CFHL's soil basics guidance are perlite, vermiculite, pumice, and rice hulls. Perlite is the most widely available and affordable. A ratio of 20 to 30 percent perlite by volume in a potting mix gives you meaningful aeration without sacrificing moisture retention. Pumice holds up longer than perlite without breaking down and is worth the slight premium for living soil builds. Avoid sand unless you are amending extremely heavy clay in quantity, because adding a small amount of sand to clay actually makes drainage worse, not better.
Choosing soil inputs: potting mix vs. garden soil, amendments, and pH basics
Potting mix vs. garden soil
This is one of the clearest decisions in growing: for containers, never use garden soil. OSU Extension is direct about this, stating that garden soil in containers brings in disease organisms, insects, and weed seeds. It also compacts in pots and drains poorly because it was not designed to function without the natural soil column below it. What you want instead is a soilless or near-soilless potting mix. As UIUC and MSU Extension both note, most commercial potting and container mixes contain no true soil at all. They are built from peat moss, coir, pine bark, perlite, and vermiculite, and they are designed to drain freely, hold air, and wick moisture evenly in a confined root zone.
One thing to watch when buying bagged mix: if a bag labeled 'potting soil' or 'garden mix' feels very heavy, it usually means it is either waterlogged or contains too much sand or actual soil. UMass Extension points this out as a common trap. A good potting mix should feel light and springy, not dense and wet.
| Medium | Best Use Case | Key Strengths | Key Weaknesses |
|---|---|---|---|
| Quality soilless potting mix | All containers, indoor grows | Sterile, well-draining, consistent | Needs regular pH monitoring, less buffered |
| Amended garden soil (outdoor beds) | Raised beds, in-ground planting | Natural biology, buffering capacity | Variable quality, may need significant amendment |
| Living soil build (custom) | Indoor/outdoor, experienced growers | Self-buffering, reduced feeding needs | Takes time to build, more complex to dial in |
| Coco coir-based mix | Heavy feeder crops, cannabis | Excellent aeration, pH neutral base | Requires consistent nutrient feeding, no buffering |
pH: the single most important number
Soil pH controls how available nutrients are to roots, and getting it wrong is the fastest way to create deficiency symptoms that look like nutrient problems but are actually chemistry problems. CSU Extension identifies approximately 6.5 as the pH where the most nutrients are available simultaneously in mineral soils. OSU Extension sets the general ideal range at 6.0 to 7.0 for most plants. NCSU Extension is specific about what happens above 6.5: trace elements like iron, manganese, copper, and zinc become progressively less available. Going too low causes its own problems. Missouri Extension research shows that below about 6.0, phosphorus, potassium, calcium, magnesium, and molybdenum availability drop while aluminum and manganese become more soluble and can injure roots.
For cannabis in soilless substrates, NCSU substrate research points to an even tighter optimal window of 5.8 to 6.2. That is why cannabis growers pH their water before every feeding. Home soil test kits use water as the extractant to estimate pH and nutrient levels, which gives you a ballpark reading. For precision decisions on lime or amendment rates, a lab test gives you more reliable numbers and crop-specific recommendations. Either way, test before you amend, not after.
Common amendments and when to use them
- Perlite or pumice: add 20 to 30 percent by volume to improve drainage and aeration in dense or water-retentive mixes
- Finished compost: add 10 to 20 percent by volume to boost organic matter, biology, and slow-release nutrition in garden beds or custom mixes
- Coco coir: a peat alternative that is pH neutral and excellent for cannabis and heavy feeders; use in place of or blended with peat
- Lime (agricultural or dolomite): raises pH in acidic soils; use lab test results to determine rate, not guesswork
- Elemental sulfur: lowers pH in alkaline soils; slow-acting, apply weeks before planting
- Worm castings: low-analysis but biologically rich; excellent for top-dressing and inoculating new builds with microbes
- Rice hulls: good perlite alternative for aeration in organic builds; breaks down over time but lasts a season
Nutrients and feeding: soil vs. hydroponics side by side
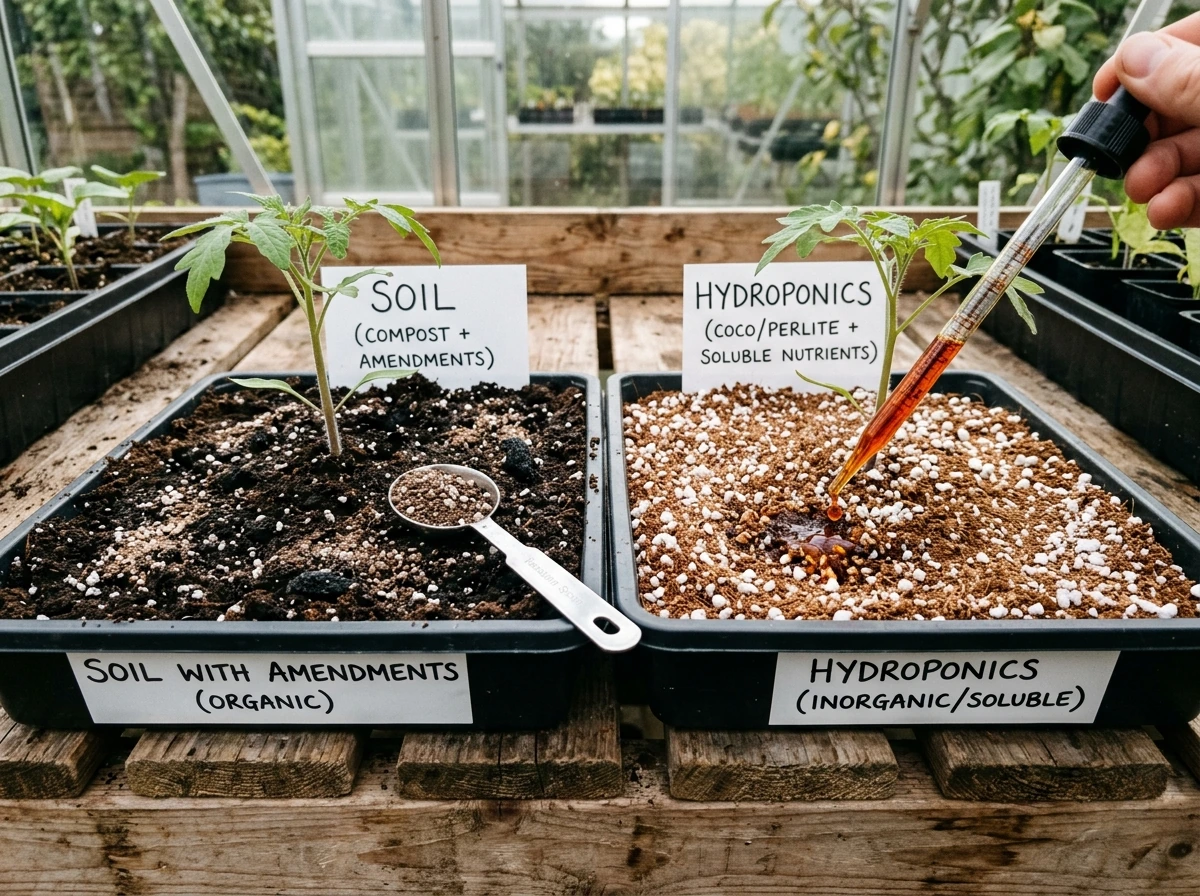
Soil and hydroponic systems handle nutrients in fundamentally different ways, and understanding that difference helps you feed more accurately regardless of which system you run.
In soil, nutrients exist in three forms: those already dissolved in soil water (immediately available), those held on soil particles by cation exchange (available over days to weeks as roots acidify the zone around them), and those locked in organic matter and released as microbes break it down. This built-in buffer means soil is more forgiving of feeding mistakes but also slower to correct when something goes wrong. A deficiency that develops in soil can take days to show up and days more to resolve after you fix the cause.
In hydroponics, nutrients are delivered directly in the water at every feed. There is no soil buffer, no organic matter releasing slowly, and no microbial mineralization. This means deficiencies and toxicities appear and resolve faster, and EC (electrical conductivity) becomes the main tool for monitoring nutrient strength. Oklahoma State Extension sets a useful benchmark: media EC readings below 750 microsiemens indicate very low nutrient status and likely deficiency. In soil, EC monitoring is less common but still useful, especially in containers where salt buildup from repeated feeding is a real risk.
| Factor | Soil Growing | Hydroponic Growing |
|---|---|---|
| Nutrient delivery | Slow release + soil chemistry | Directly in water, every feed |
| pH management | Amend soil before planting, retest seasonally | Adjust every reservoir change or fill |
| Buffer capacity | High (organic matter, CEC) | None (immediate response to changes) |
| Deficiency response time | Days to appear, days to fix | Hours to appear, 24 to 48 hours to fix |
| Overfeeding risk | Lower (soil buffers excess) | Higher (no dilution or buffer) |
| EC monitoring | Occasional, useful in containers | Essential, check every 1 to 3 days |
| Microbial activity | Central to nutrient cycle | Minimal or absent in most systems |
| Beginner friendliness | More forgiving, slower feedback | Faster results, steeper learning curve |
If you are running soil and want some of the control that hydroponic growers get, pH-adjusted watering and periodic EC checks of your runoff water are the two practices that give you the most information without switching systems. When runoff EC climbs well above your input EC, salts are building up and it is time to flush with plain pH-adjusted water.
Setup checklist: containers, aeration, watering, and root-zone management
Container selection
Container choice affects oxygen to roots more than most growers realize. Fabric pots air-prune roots passively and prevent circling roots, making them a strong choice for cannabis and vegetables with aggressive root systems. Hard plastic pots are fine if they have adequate drainage holes. Terra cotta wicks away moisture through the walls, which is helpful for plants that prefer to dry out between waterings and risky for plants that want consistent moisture. Whatever you use, drainage holes are non-negotiable: a container without drainage is a drowning tank.
Aeration and oxygen to roots
Roots need oxygen as much as they need water, and waterlogged soil starves them of it. ISU Extension research on potting media shows that when media reaches full saturation (what they describe as moisture Level 5), plant functions are limited due to oxygen deprivation near the roots, and roots tend to cluster near the surface where oxygen is still available. This is why you see roots peeking out of the top of a pot when a plant has been consistently overwatered. A well-aerated mix prevents this by maintaining air-filled pore space even at field capacity. Adding perlite or pumice, using fabric pots, and keeping container size appropriate for the root mass all help maintain that oxygen-rich zone.
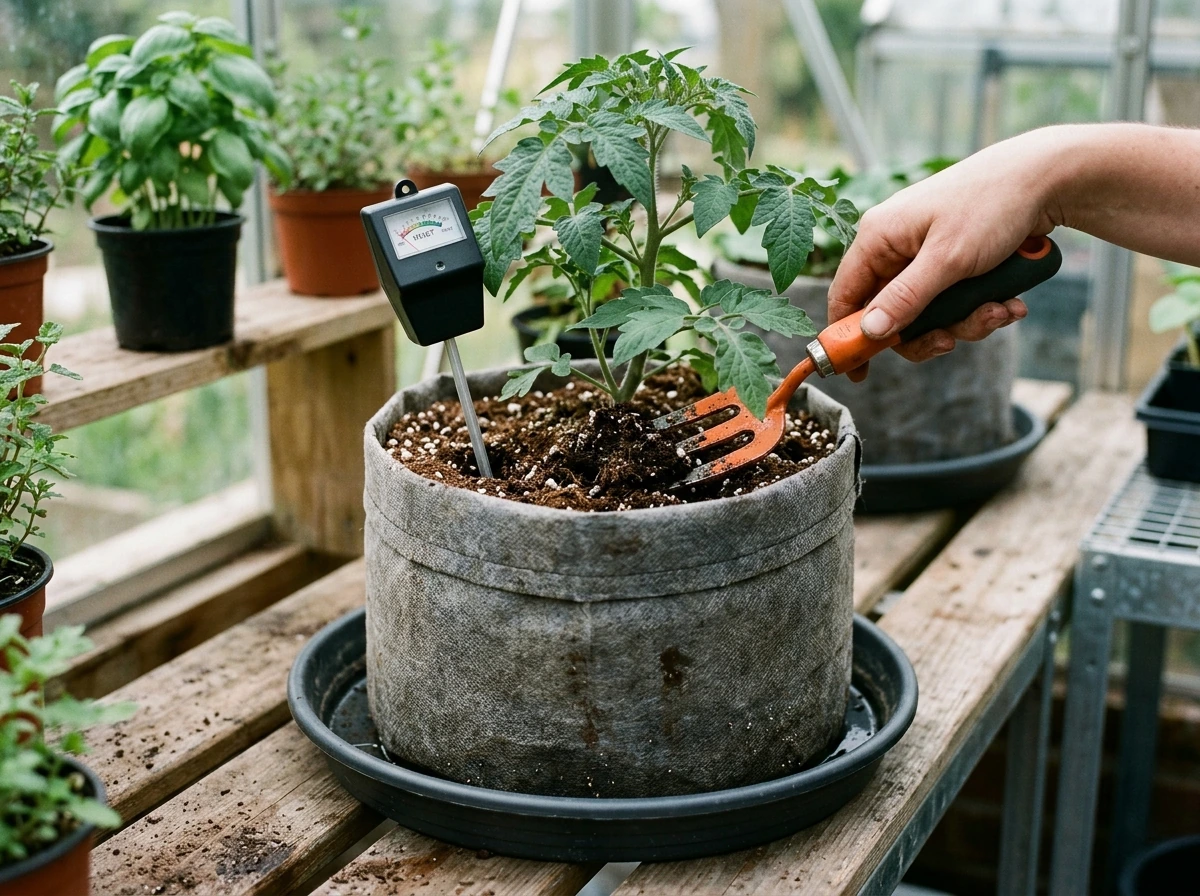
Watering discipline
The most common mistake across all grow mediums is overwatering. Illinois Extension's houseplant and container guidance emphasizes 'moist but not soggy,' with some plants actually benefiting from moderate drying between waterings. OSU Extension's watering guidance reinforces that you genuinely cannot know whether you are overwatering or underwatering unless you check soil moisture directly before each watering. Use a finger test (stick two knuckles into the soil) or a cheap soil moisture meter for containers. For larger outdoor beds, a wooden dowel pushed 6 inches into the soil tells you a lot more than a surface check. Water when the medium is approaching dry but not bone dry, and water thoroughly until runoff flows from drainage holes so the entire root zone gets moisture.
Root-zone management
- Match container size to plant stage: starting in too large a pot leaves excess wet medium around a small root zone, which invites rot and gnats
- Repot when roots circle the bottom of the container or emerge from drainage holes, which signals the plant has outgrown the current volume
- Avoid compacting the surface of your medium when watering: use a gentle rose head watering wand or water slowly around the base rather than blasting the soil
- In outdoor beds, avoid walking on or working heavily compacted soil when wet; Nebraska Extension notes compaction compresses soil pores and restricts oxygen and water movement, directly limiting root growth
- Top-dress containers with a thin layer of worm castings or finished compost mid-season to replenish surface biology without disturbing roots
Troubleshooting: when your soil isn't working
Compacted soil and poor drainage
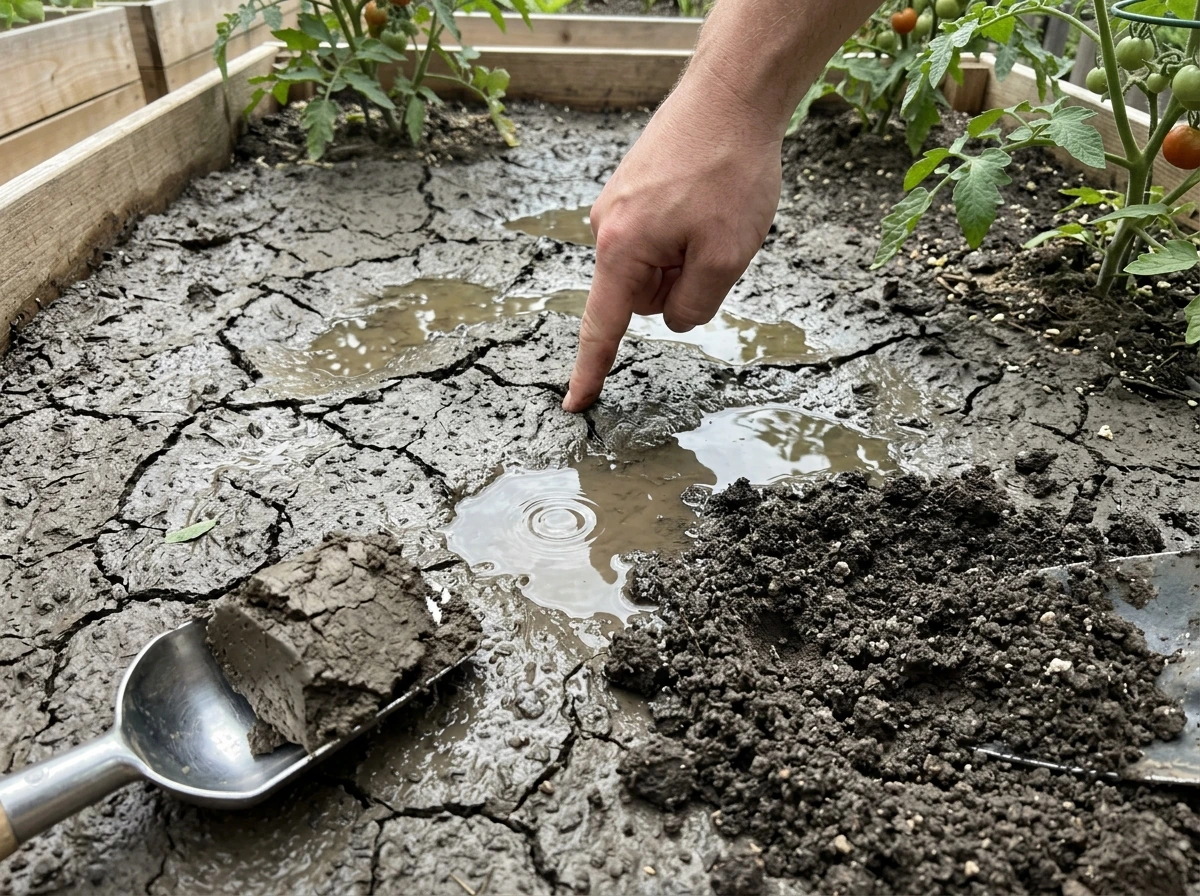
If water pools on the surface of your container or bed for more than a few seconds before absorbing, you have a compaction or drainage problem. In containers, this usually means the mix has broken down over time, the perlite has settled, or the original mix was too dense. The fix for containers is repotting into fresh, properly amended medium. For outdoor beds, top-dressing with 2 to 4 inches of finished compost and avoiding tilling wet soil helps over a season, while deep compaction may require physical aeration with a broadfork or aerator.
Nutrient deficiencies and toxicities
Before reaching for more fertilizer, check your pH. Iowa State Extension and NCSU both emphasize that most mid-grow deficiency symptoms in otherwise fed plants are pH-driven lockout rather than an actual absence of nutrients in the medium. Yellowing between leaf veins (interveinal chlorosis) often signals iron or manganese lockout from high pH. Dark purple or bronzed older leaves combined with stunted growth can point to phosphorus lockout from low pH, which also tends to increase aluminum and manganese to potentially toxic levels. Penn State and OSU Extension both note that overwatering stress can mimic nutrient deficiency visually, so always check soil moisture and pH before diagnosing a feeding problem. If pH is in range and you are feeding appropriately, then check your EC and look at whether you are actually delivering nutrients to the root zone or just saturating the surface.
Fungus gnats and mold
Fungus gnats are a soil-grow rite of passage, and they are almost always your own fault. UC IPM is clear that gnat populations are favored by excess humidity, overwatering, poor drainage, prolonged wet surfaces, standing water, and the use of incompletely composted or unpasteurized organic matter in growing media. Purdue Extension adds that the larvae feed in moist soil conditions and are directly associated with overwatering. The fix is behavioral first: let your medium dry down more between waterings, ensure drainage is working, and if you are top-dressing with compost, make sure it is fully finished. Covering the top inch of soil with a layer of dry perlite or sand removes the moist surface that adults prefer for egg-laying. Sticky yellow traps catch adults and give you a population count. For persistent infestations, beneficial nematodes (Steinernema feltiae) applied to the root zone target larvae without harming plants.
Surface mold (white fuzzy growth on top of soil) is almost always harmless saprophytic fungus feeding on organic matter, but it signals consistently wet conditions. Improve airflow, reduce watering frequency, and remove any decomposing organic debris from the soil surface. If mold appears on the stems at the soil line, that is a different problem: damping off, which is caused by Pythium or Fusarium and is more serious. Damping off prevention starts with using pasteurized, disease-free starting media (which is another reason the 'never use garden soil in containers' rule exists) and avoiding overwatering from the start.
Root rot
Root rot is the end-stage result of sustained overwatering, poor drainage, or oxygen deprivation, and Purdue Extension links it directly to too-wet soil conditions. Symptoms show up above ground first: wilting that does not respond to watering, yellowing leaves, and a general decline that looks like drought stress even though the soil is wet. If you pull a plant and the roots are brown, mushy, or have a foul smell, root rot is confirmed. Mild cases can be saved by removing damaged roots, treating with a hydrogen peroxide solution or beneficial Trichoderma product, repotting into fresh dry medium, and dramatically reducing watering frequency. Severe cases usually mean starting over.
How to upgrade your soil today, and when to repot
If your current grow is struggling or you are starting fresh, here is a practical sequence you can execute today or this week, depending on where you are in the grow cycle.
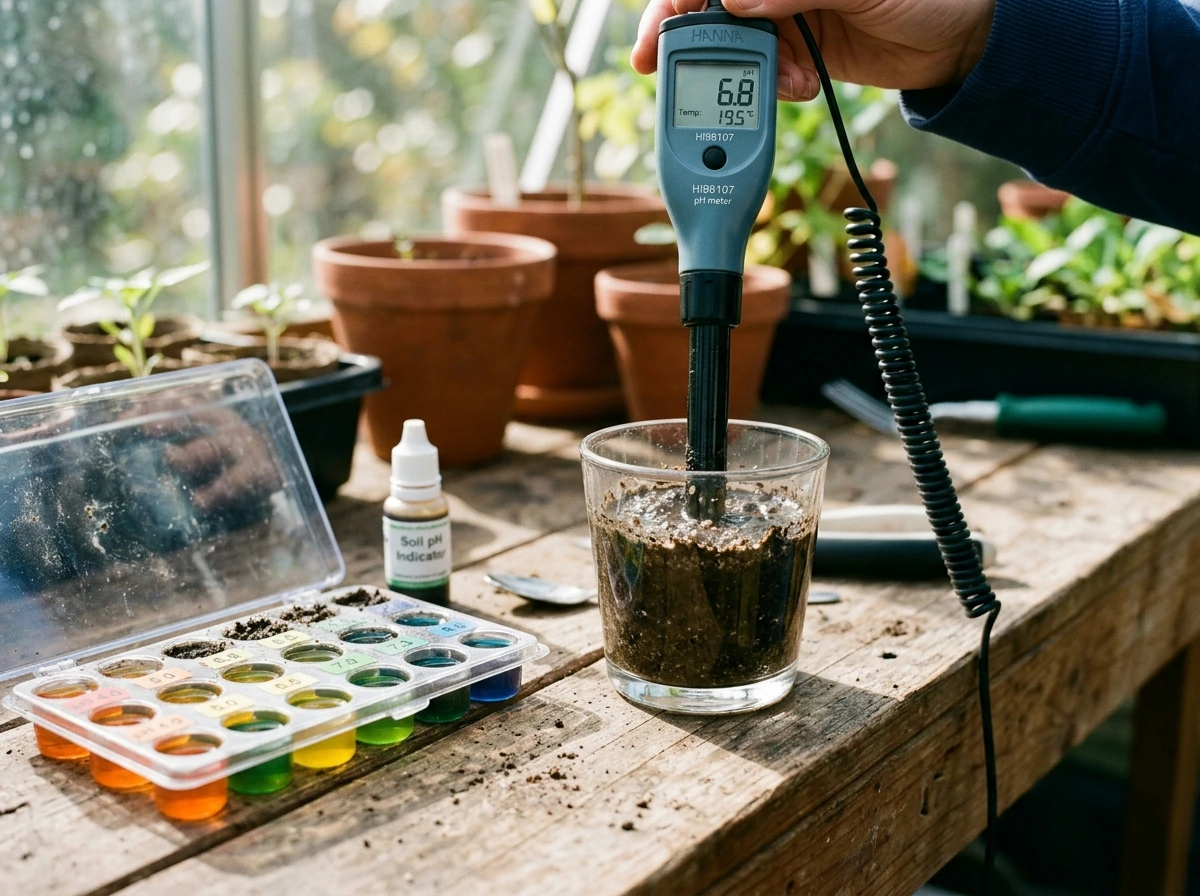
- Test your pH first: use a home soil test kit or pH meter with a slurry test (mix 1 part soil with 1 part distilled water, wait 20 minutes, test the liquid). SDSU Extension notes home kits use water extraction and give a usable ballpark. If you need precision for amendment rates, send a sample to your state extension lab. This step costs almost nothing and tells you whether every other problem you are seeing is actually a pH problem in disguise.
- Check your drainage: water your container or bed slowly and watch how quickly it absorbs. If it pools more than a few seconds or your medium feels consistently wet 48 hours after watering, drainage is your first fix before anything else.
- Assess your medium's structure: squeeze a handful of damp (not wet) soil or mix. It should clump lightly and then break apart with gentle pressure. If it forms a brick, it needs amendment. If it falls apart immediately and feels sandy, it may not hold moisture long enough.
- Amend containers that are not in active root growth: if your plant is in vegetative stage and the medium is structurally poor, you can top-dress with a 50/50 mix of finished compost and perlite (about half an inch deep) and work it gently into the top layer. For more serious issues, plan a repot.
- Repot when: roots are circling the drainage holes, the plant is wilting despite adequate watering and good pH, or the medium has become hydrophobic (water runs straight through without absorbing). Repot into the next container size up (no more than 2 to 3 gallons larger at a time) with fresh amended soilless mix. The best time is early in vegetative growth, not during flower or fruiting unless absolutely necessary.
- Correct pH before the next watering: if your pH is off, adjust your next watering to the correct range. For soil with low pH, water in a dilute lime solution or switch to slightly alkaline water temporarily. For high pH, use a small amount of pH-down solution (phosphoric acid is common) or a dilute vinegar solution as a temporary measure while planning a proper soil amendment.
- Set a watering protocol: after any amendment or repot, water once thoroughly to settle the medium, then wait until the top 2 inches are dry before watering again. Track how many days this takes in your environment. That interval becomes your baseline watering schedule.
- Monitor for one to two weeks: watch for new growth that looks healthy, check that older problem leaves stop progressing (they will not recover, but the newest growth tells you whether the fix worked), and retest pH after two full watering cycles to confirm you have stabilized the root zone.
Experienced growers refine this by adding EC checks of runoff water at step 7, tracking both pH and EC over time to catch salt buildup or nutrient drawdown before it shows up as a plant symptom. Beginners should focus on steps 1, 2, and 7 first. Getting pH and drainage right solves the majority of grow problems before they start.
Building the best grow soil is an iterative process. Each grow teaches you something: this mix dries too fast, that compost was not fully finished, the containers need bigger drainage holes. The framework here applies whether you are running a 4x4 indoor tent with cannabis, a raised bed of tomatoes, or an outdoor flower garden. Dial in structure, pH, and watering discipline, and the biology takes care of the rest.
FAQ
How soon after I add compost, lime, or other amendments should I retest the pH for the best grow soil?
For most crops, do a soil test before you add lime or fertilizer, then recheck after corrections, not during active corrections. A practical approach is to test the starting soil, apply amendments, wait at least 2 to 4 weeks for pH to stabilize, then retest. This avoids chasing symptoms caused by fresh amendment settling rather than true pH chemistry.
What should I do if my runoff EC keeps climbing in a soil or soilless container mix?
If runoff EC rises above your input EC and keeps trending upward over multiple waterings, salts are building up, even if plants look “mostly okay.” Flush with properly pH-adjusted plain water until runoff EC drops noticeably, then resume feeding at a lower strength or with more frequent, lighter irrigations. In containers, repeat the flush sooner than you would in outdoor beds because there is no natural leaching from rain.
Can compost be high quality but still cause problems in living soil? How do I tell?
Yes, you can have good “compost” that is still not finished enough for a living soil build. Finished compost should be evenly dark and not show recognizable materials, and it should smell earthy rather than ammonia or sulfur. If it smells “hot” or looks chunky, treat it as unfinished by holding it longer, sieving it, or using it more cautiously, because partially decomposed material can create oxygen-hungry hotspots.
Is “water on a schedule” ever appropriate for the best grow soil?
Bone-dry extremes can be as damaging as overwatering because they shrink and expand soil pores, reduce microbial activity, and can cause nutrient availability swings. Instead of a strict schedule, use the right trigger: water when the mix is approaching dry but before it becomes hydrophobic, and ensure you water thoroughly so the entire root zone is wetted. For containers, a moisture meter is most helpful if you calibrate it for your exact mix.
My container drains slowly. Should I change watering or change the soil mix?
In containers, insufficient drainage is usually the main reason salts and oxygen problems develop together. If you notice water pooling on the surface for more than a few seconds, check that drainage holes are clear, the pot is not sitting in a saucer that holds runoff, and the mix has enough aeration (for example, perlite or pumice at the recommended volume range). Without these fixes, adding more fertilizer only worsens root stress.
What are common mistake patterns when growers keep adding fertilizer but symptoms do not improve?
If plants show deficiency-like symptoms but your pH is in range, look at delivery and root health before adding more nutrients. First verify you are feeding what the roots can access, then check for signs of overwatering (surface stays wet, roots cluster near the top, persistent wilting) or compacted mix. Only after those checks should you adjust EC upward, because in many cases the “issue” is water and oxygen, not fertilizer strength.
How do I confirm fungus gnat control is working, not just temporarily reduced?
For fungal gnats, the fastest lever is drying the top portion and reducing consistently wet conditions, because larvae need moist media. Let the medium dry down more between waterings, confirm drainage is working, remove decomposing surface debris, and consider a thin top layer of dry inert material to interrupt egg-laying. Sticky traps help you see whether the adult population is actually dropping after you change conditions.
How can I prevent damping-off in containers without harsh sterilization?
Seedlings and young transplants are more vulnerable to damping-off than established plants, so the best grow soil approach is preventive. Use clean starting media, avoid watering so frequently that the top stays wet, and ensure airflow around the soil surface. If damping-off symptoms appear at the stem base, stop adding moisture immediately and act on aeration and watering first, since many fixes fail when the environment stays saturated.
Why can biology seem to stall even when my soil pH looks roughly correct?
Most beneficial organisms tolerate a pH window, but the bigger risk is rapid pH swings caused by inconsistent watering chemistry or overcorrecting. Keep pH adjustment consistent when you water, and if you are building living soil, avoid mixing products that push pH in opposite directions at different times. Sudden shifts can reduce biology activity even when the target range looks “close enough.”
Can I reuse potting mix from a previous grow and still get the best grow soil results?
You may be able to reuse a container mix once in a while, but only if it stayed healthy and was not chronically waterlogged or full of disease pressure. The safer standard is to refresh the aeration portion (perlite/pumice) and top-dress with properly finished compost, then verify with a soil test if you plan to make major fertilizer or lime changes. If you had root rot, damping-off, or persistent gnat issues, start fresh rather than reusing the same medium.