best soil to grow plants is a well-draining, moderately fertile loam with a pH somewhere between 6.0 and 7.0, amended with compost and enough perlite or coarse material to keep roots breathing. That covers most flowers in most situations. But "most" isn't "all," and the difference between a plant that thrives and one that sulks usually comes down to three things you can actually measure and fix: drainage, pH, and nutrient availability. This guide walks through all of it, from picking the right mix off the shelf to fixing problem soil you already have, with specific targets for roses, bulbs, annuals, and perennials.
Best Soil to Grow Flowers: Mixes, pH, Drainage Guide
Marcus Holloway
24 Mar 2026
Match Your Soil to Your Flowers' Actual Needs
Not every flower wants the same conditions, and the three biggest variables are light exposure, water demand, and root architecture. These three things tell you almost everything about what soil will work.
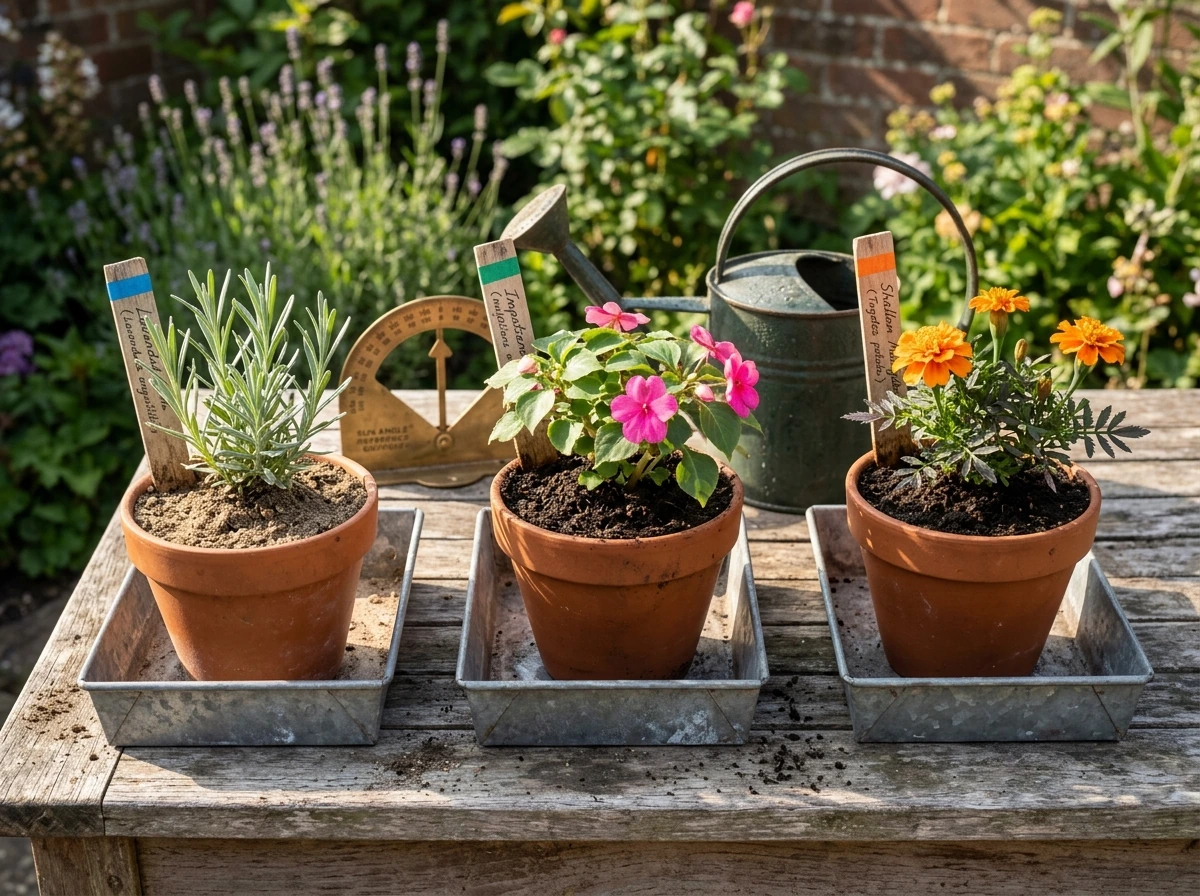
Sun-loving flowers grown in full exposure tend to dry out faster and generally want soil that drains quickly rather than holding moisture for days. Think lavender, zinnias, or marigolds. Shade-tolerant flowers like impatiens or astilbe often appreciate a mix that stays a bit more consistently moist, so a higher organic content helps. Sun-loving flowers grown in full exposure tend to dry out faster and generally want soil that drains quickly rather than holding moisture for days. Think lavender, zinnias, or marigolds. Shade-tolerant flowers like impatiens or astilbe often appreciate a mix that stays a bit more consistently moist, so a higher organic content helps. best soil for outdoor grow Water-lovers like canna or cardinal flower can handle heavier, more moisture-retentive soil, while drought-tolerant species like yarrow and echinacea need a sandier, leaner profile or they rot. Water-lovers like canna or cardinal flower can handle heavier, more moisture-retentive soil, while drought-tolerant species like yarrow and echinacea need a sandier, leaner profile or they rot.
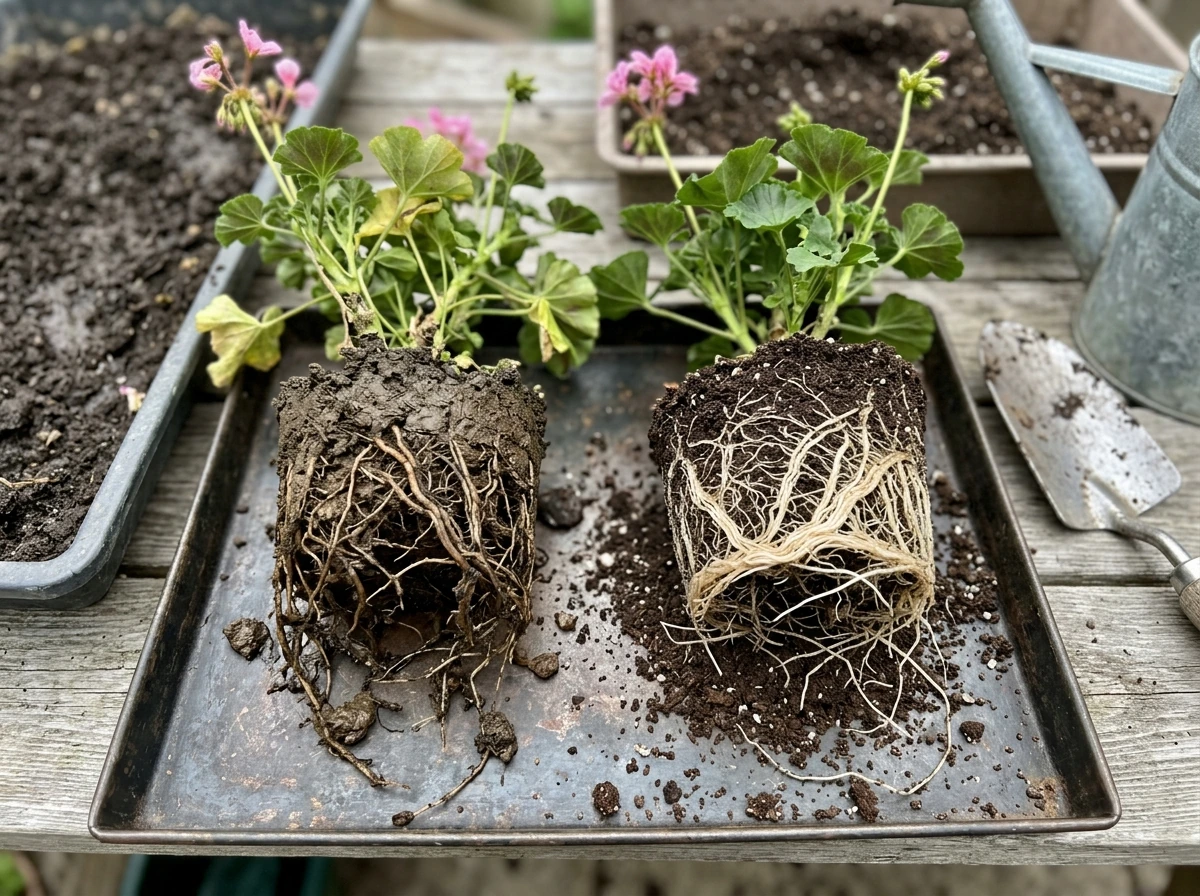
Root architecture matters just as much. Bulbs (tulips, dahlias, alliums) store energy underground and are extremely sensitive to sitting in wet soil. They need sharp drainage above almost anything else. Tap-rooted flowers like poppies dislike compacted soil because their single deep root can't push through. Fibrous-rooted annuals are more forgiving, but still fail in waterlogged ground. When you know how your flower roots and how it drinks, choosing a base soil becomes much more logical.
Best All-Purpose Mix vs. Tailored Mixes for Specific Flowers
If you want one mix that handles most garden flowers without fuss, aim for a loam-based soil blended with 20 to 30 percent compost by volume and enough perlite to keep the structure open. Something like a commercial "garden soil" or "raised bed mix" from a reputable brand, amended at home with a few inches of compost worked in, gets you 80 percent of the way there for most annuals, perennials, and cottage-garden plants.
But once you move into specific flower families, the targets shift. Here's a practical breakdown:
| Flower Type | Ideal pH | Drainage Need | Key Soil Adjustment |
|---|---|---|---|
| Annuals (general) | 6.5 to 7.5 | Moderate to good | Compost + balanced slow-release fertilizer |
| Perennials (general) | 6.0 to 7.0 | Well-drained, fertile | Compost at planting, annual top-dress |
| Roses | 5.5 to 6.5 | Well-drained, deep | Compost, avoid compaction, monitor pH closely |
| Flowering bulbs | 6.0 to 6.8 | Sharp drainage critical | Perlite or grit in heavy soils, raised beds |
| Drought-tolerant flowers | 6.0 to 7.5 | Fast-draining, lean | Reduce compost, add coarse grit or sand |
| Water-loving flowers | 6.0 to 7.0 | Moisture-retentive | Extra compost, mulch surface to retain moisture |
Roses are worth calling out specifically because they have a narrower preferred pH window. Missouri Extension puts it at 5.5 to 6.5 and University of Arizona guidance narrows it further to 6.0 to 6.5. That range matters because roses are heavy feeders and pH directly controls how well they can absorb iron, manganese, and other nutrients. Getting a rose planted in soil sitting at pH 7.5 is a recipe for yellowing leaves no matter how much fertilizer you add.
Bulbs are similarly sensitive on the drainage side. Even a slightly heavy soil that holds water around bulbs in winter or early spring causes rot before they can establish. If your native soil is clay-heavy, bulbs go into raised beds or very well-amended ground, full stop.
Drainage, Aeration, and pH: What to Actually Aim For

Testing Drainage Before You Plant
The simplest drainage test is a percolation test. Dig a hole about 12 inches deep and 12 inches wide, fill it with water, let it drain completely, then refill it and measure how fast the water level drops. You're measuring in minutes per inch. Most flowers do well when the water level drops at roughly 1 to 3 inches per hour. If your hole still has standing water 4 or more hours later, you have a drainage problem that needs fixing before you plant anything that doesn't like wet feet. University of Minnesota recommends running multiple test holes if you're covering a large bed, since soil texture can vary across even a small garden area.
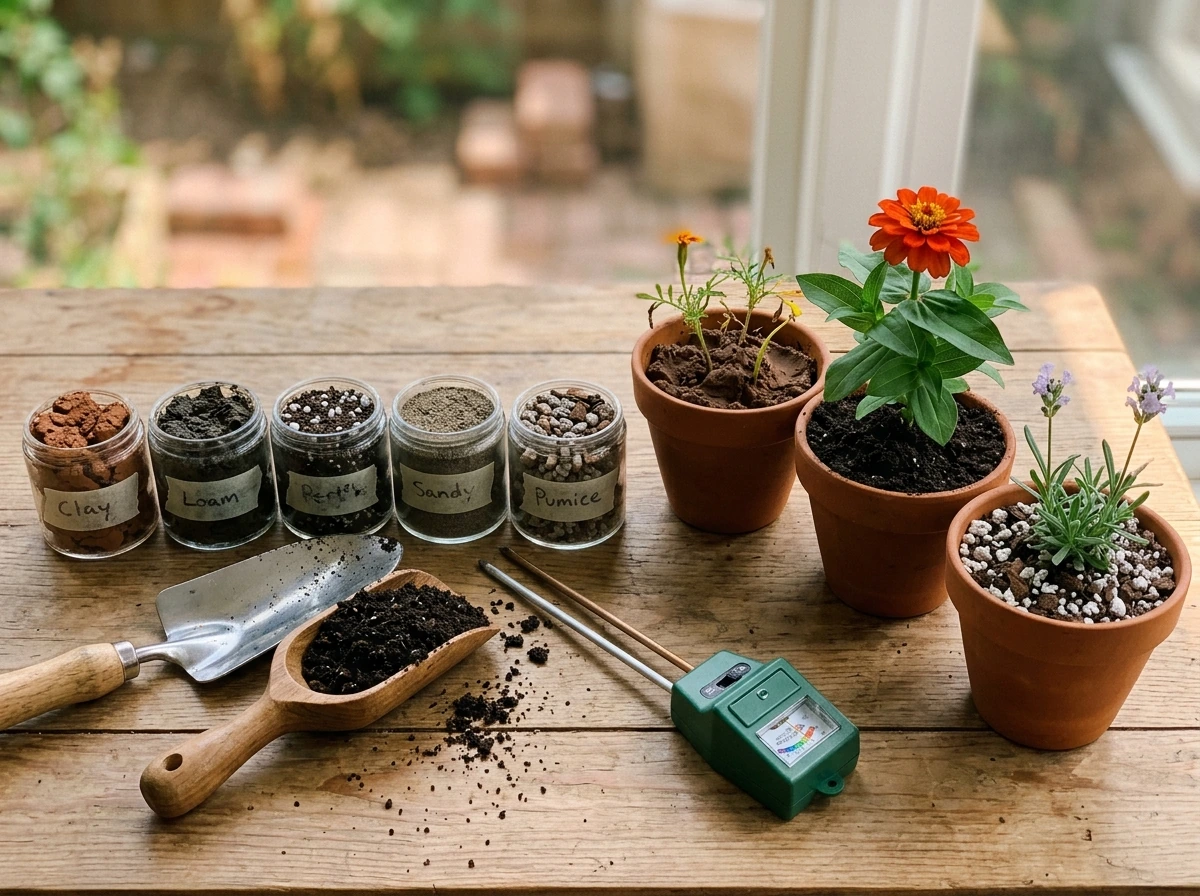
Understanding why drainage fails helps you fix it correctly. University of Minnesota Extension explains that drainable porosity (the pore space in soil that actually releases water) is what separates well-drained from waterlogged soil. Sandy soils have high drainable porosity. Clay soils have very low drainable porosity because the tiny particles pack tightly and hold water through capillary tension. Silt sits in between. The Montana State Soil Texture Jar Test is a useful DIY method: put a soil sample in a jar with water, shake it, and let it settle over 24 to 48 hours. Sand settles first, silt in the middle, clay stays suspended longest. The layers tell you what you're working with.
Testing and Adjusting pH
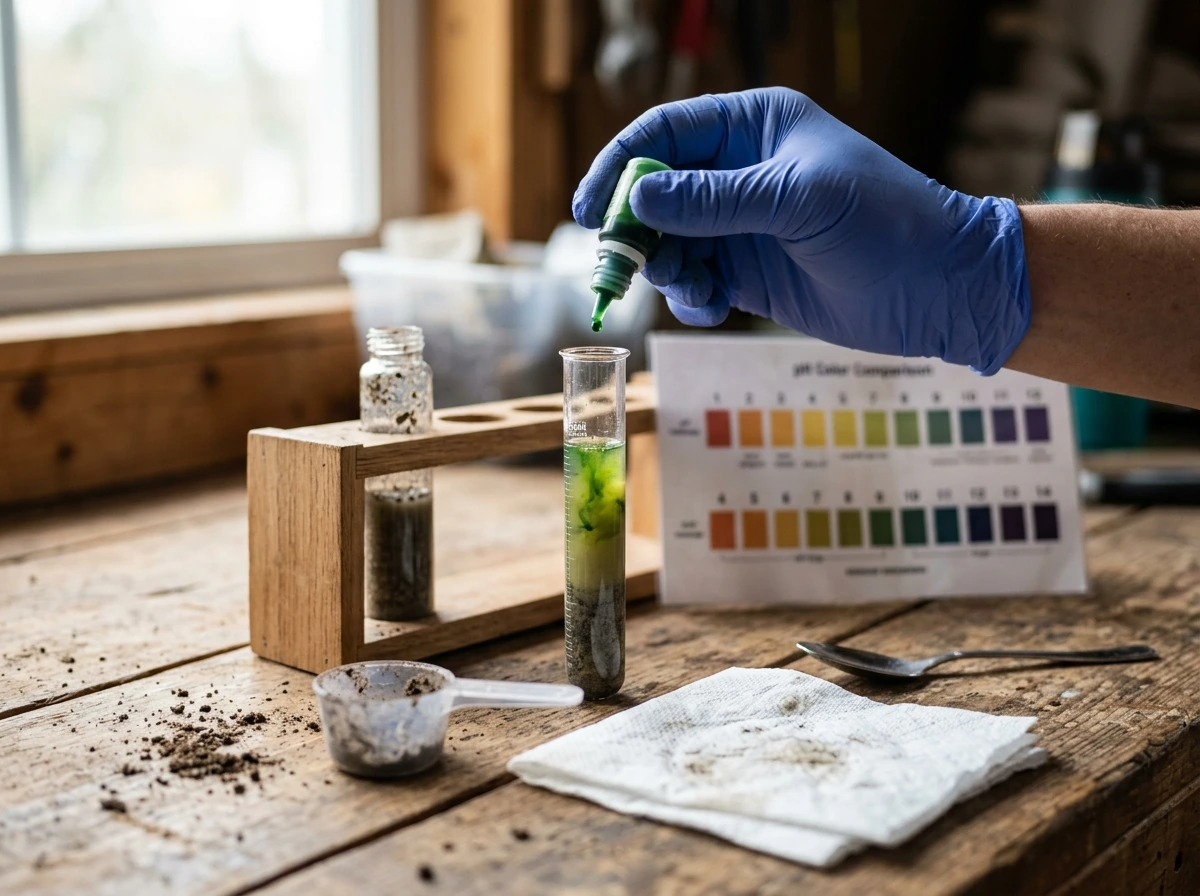
pH controls nutrient availability more than almost any other single factor. West Virginia University Extension makes the point directly: soil pH must stay within an optimum range to ensure adequate nutrient supply in the soil solution. Too high and iron, manganese, and zinc lock up. Too low and aluminum and manganese become toxic. For most flowers, you're aiming for 6.0 to 7.0, with tighter windows for roses and bulbs as noted above.
DIY test kits are a reasonable starting point. DIY test kits are a reasonable starting point. Cornell's [mysoil soil test kit grow the best lawn & garden](/best-grow-soils/mysoil-soil-test-kit-grow-the-best-lawn-garden) kit covers a range of roughly 4.0 to 6.2 on its low end, which is useful for identifying acidic problem soils. covers a range of roughly 4.0 to 6.2 on its low end, which is useful for identifying acidic problem soils. For anything more precise or for beds you're investing serious money in, a lab test through your local Cooperative Extension service gives you a full nutrient profile alongside pH, and the cost is usually under $20. To raise pH, work in ground limestone. To lower it, use sulfur or acidifying fertilizers. Neither change happens overnight. Retest after 4 to 6 weeks before adding more.
One thing worth noting: the idea that "6.5 works for everything" isn't quite right. WVU Extension's flower pH table shows specific targets across dozens of flower species, and exceptions are common enough that if you're growing a specific variety and it's struggling despite decent care, pH is often the culprit worth checking first.
How to Amend Garden Soil the Right Way
Compost is the best general-purpose amendment for almost any flower bed. It improves drainage in clay soils by breaking up the fine particle structure, improves water retention in sandy soils, and adds slow-release nutrients and beneficial microbial activity. Oregon State University Extension recommends applying a compost layer of about 1/4 inch to 1 inch per year to existing beds as an ongoing maintenance approach. Utah State University Extension suggests mixing about 1 inch of compost into the soil before planting as a general guideline for new beds.
More is not always better with compost. University of Illinois Extension notes maximum use rates depending on end use, and over-amending with compost can push nutrient levels (especially phosphorus) high enough to cause imbalances. If you've been adding heavy compost annually for years, get a soil test before adding more, rather than assuming the bed needs it.
The Truth About Sand and Clay
This one comes up constantly, and the answer is almost always: don't add sand to clay soil unless you can add a massive amount. University of Illinois Extension explains that you'd need something close to a 1:1 sand-to-clay ratio by volume to actually shift drainage. UGA Extension is even more direct, noting that sand may only improve clay drainage if the sand content reaches around 70 percent of the total soil mix. Anything less and you often end up with a soil that's more like concrete: small amounts of sand fill the existing clay pore spaces and make things worse. Instead, work in compost, aged bark fines, or perlite. These materials create stable aggregates in clay without the backfire risk.
Perlite is genuinely useful in heavy native soils and in container mixes. It's lightweight, pH-neutral, and physically holds pore spaces open even as organic matter breaks down. For in-ground beds with drainage problems, combining compost with 10 to 20 percent perlite by volume is a practical, evidence-backed approach. For extreme drainage issues, raised beds are often a better long-term solution than trying to fundamentally reform a clay-heavy soil.
In-Ground Beds vs. Containers: Two Different Soil Strategies
The soil logic for pots and planters is fundamentally different from in-ground beds, and using the wrong approach in the wrong setting causes a lot of avoidable problems.
In-Ground Beds
In a garden bed, your goal is to work with the existing soil profile rather than replace it. Native soil has structure, microbial life, and drainage characteristics built over years. You amend it, improve it, and adjust pH, but you don't try to wholesale replace it with bagged potting mix, which would create a perched water table at the interface between the two materials and actually worsen drainage. Build up organic matter annually with that 1/4 to 1-inch compost top-dress, loosen compaction mechanically before planting, and correct pH as needed. For perennials especially, this slow improvement approach pays off over multiple seasons.
Container Growing
Containers need a completely different medium. Penn State Extension states clearly that most potting mixes are soilless, typically combining peat moss, vermiculite, perlite, and sometimes compost or organic fertilizer components. The reason is practical: soilless mixes avoid soilborne diseases, drain more reliably in the confined volume of a pot, and stay light enough for containers to be moved. Putting native garden soil or in-ground amended soil directly into a pot almost always leads to compaction and poor drainage within a season. UF/IFAS Extension reinforces this, noting that soilless potting mixes are specifically recommended for containers, with drainage holes as a non-negotiable setup requirement.
Soil for Indoor Pots and Balcony Containers
Indoor and balcony setups add two more constraints: weight and nutrient management. A large pot full of dense soil on a balcony can exceed structural load limits, and indoors you need a mix that won't stay soggy for days in reduced airflow and light. [Lightweight soilless mixes](/best-grow-soils/best-soil-for-indoor-grow) built around peat or coco coir, perlite, and a small fraction of compost hit both targets.
For feeding, the choice is between slow-release granular fertilizers mixed into the medium at planting and ongoing liquid feeding. Both work, but they serve different situations. Slow-release fertilizer incorporated before planting (as Oregon State Extension recommends for container setup) handles baseline nutrition for the first several weeks with no further action needed. The downside is that repeated watering eventually leaches nutrients from the container medium, as University of Minnesota Extension notes, so slow-release formulations do need topping up. University of Minnesota recommends starting regular feeding between 2 and 6 weeks after planting, depending on your watering frequency and how fast the plants are growing.
Iowa State University Extension points out that soilless potting media have very low cation exchange capacity, meaning they don't hold nutrients the way native soil does. That's why container flowers need ongoing attention to feeding rather than a one-time amendment. Liquid fertilizers give you precise control and allow you to adjust based on what you're seeing in the plant, but they require consistent application on a schedule. For balcony gardens where consistent watering is already part of the routine, liquid feeding every 1 to 2 weeks through the growing season works well.
What Bad Soil Actually Does to Your Flowers (and How to Fix It)
Most flower failures trace back to one of four soil-related problems. Knowing what to look for speeds up diagnosis considerably.
| Problem | What You See | Root Cause | Fix |
|---|---|---|---|
| Poor drainage / root rot | Wilting despite wet soil, brown mushy roots, stem base collapse | Waterlogged soil, anaerobic conditions | Improve drainage (compost + perlite), raised beds, fix container drainage holes |
| Nutrient lockout | Deficiency symptoms despite fertilizing, no response to feeding | pH out of range blocking nutrient uptake | Test and correct pH first, then reapply fertilizer |
| Chlorosis / yellowing leaves | Yellow leaves with green veins (interveinal chlorosis) | Iron or manganese deficiency from high pH, or nitrogen deficiency | Lower pH for iron/manganese; add nitrogen source if general yellowing |
| Stunted or soft growth | Plants grow slowly or produce lots of leaves but few flowers | Either compacted soil blocking roots, or over-fertilization with nitrogen | Loosen soil, reduce nitrogen, ensure phosphorus is available for flowering |
Penn State Extension makes a useful observation about over-fertilized perennials: too much nitrogen produces excessive soft vegetative growth and actually reduces flowering. That means more fertilizer is not a fix for a plant that won't bloom. If your perennials are lush and green but not flowering, check nitrogen levels and consider whether you've been over-amending with compost or high-nitrogen feeds.
Nutrient lockout is probably the most misdiagnosed problem in flower growing because it looks exactly like nutrient deficiency, and the instinctive response is to add more fertilizer, which often makes things worse. If you're feeding regularly and still seeing deficiency symptoms, test pH before doing anything else. A pH correction often resolves the visual problem within a couple of weeks without changing anything about your fertilizer program.
When Hydroponic or Soilless Growing Makes More Sense for Flowers
Soil is not always the right answer, and for certain situations a soilless or hydroponic approach to flowers is genuinely worth considering. The site covers both methods in depth, and the honest comparison is that hydroponics trades soil management complexity for nutrient solution management complexity. Neither is simpler overall, but one may fit your situation better.
Hydroponic and soilless setups make particular sense for flowers when:
- You're growing indoors in a space where managing pH and drainage in soil containers is difficult or messy
- You've had repeated problems with soilborne diseases (like Fusarium or Pythium) that keep affecting soil-grown flowers
- You want precise, fast control over nutrient delivery for cut flower production where timing and stem quality matter
- You're growing on a hard surface (like a concrete balcony) where weight and drainage runoff are practical constraints
- You want to extend growing seasons or grow year-round regardless of outdoor soil conditions
For soilless flower growing, coco coir is one of the most practical transition media because it handles and behaves somewhat like soil, buffers pH reasonably well, and supports a wide range of flowering plants. Pair it with a complete hydroponic nutrient solution that includes calcium and magnesium, since coco naturally binds those two elements. Perlite blended at 30 to 50 percent into coco improves aeration and drainage further. More automated systems like NFT (nutrient film technique) or DWC (deep water culture) can work for certain cut flowers, but they require more precise pH and EC monitoring and are better suited once you have some hydroponic experience. If you're just transitioning from soil and want more control, a coco-based container setup with liquid nutrients is the most approachable starting point.
Start Here: What to Do Today
If you've just landed here trying to figure out what to actually do right now, here's the short version in order of priority:
- Test your existing soil or your intended planting area. At minimum, do a DIY pH test. If you're investing in a bed of roses or perennials, spend the $15 to $20 on a Cooperative Extension lab test. It tells you pH, nutrient levels, and organic matter content, and it removes all the guesswork from amending.
- Do a drainage test on any new bed before planting. Fill a 12-inch hole with water, let it drain, refill, and time how fast the water level drops. If it's sitting there for 4-plus hours, address drainage before you spend money on plants.
- Identify what you're growing and match the pH and drainage targets above. Roses, bulbs, annuals, and perennials all have slightly different sweet spots, and knowing those targets shapes every decision that follows.
- For in-ground beds: work in 1 to 2 inches of compost before planting, adjust pH if needed, and skip the sand if your soil is clay-heavy. Add perlite instead if you need to open up the structure.
- For containers and pots: use a soilless potting mix, confirm drainage holes exist, incorporate a slow-release fertilizer at setup, and start liquid feeding 2 to 6 weeks after planting.
- For indoor or balcony setups: choose a lightweight coco-perlite or peat-perlite blend, keep it simple on nutrients at the start, and monitor pH in your water or nutrient solution every few waterings.
- If soil problems keep repeating despite your best efforts, consider a soilless or coco-based container setup for better control over the key variables.
The goal with all of this is to stop guessing and start measuring. Most flower failures are fixable once you know whether you're dealing with a pH problem, a drainage problem, or a nutrient problem. Test first, amend specifically, and your soil choices will stop feeling like a gamble.
FAQ
Can I use bagged “potting soil” from the store for flower beds in the ground?
Usually not. In-ground beds need to be amended into existing soil rather than replaced, because a full-depth layer of potting mix can create a perched water table at the interface with native soil. Use it only as a small top-dress or spot-amend, then focus on compost, perlite, and pH correction.
How do I fix flowers that wilt even though the soil seems moist?
Wilting with wet soil often points to poor oxygen at the roots (waterlogged conditions) or pH-driven nutrient lockout. First check drainage with the percolation test, then test soil pH before increasing fertilizer. If pH is out of range, correcting it can relieve symptoms without changing feeding.
What’s the best way to choose between compost, perlite, and sand for drainage problems?
Start with compost to improve structure and biological activity, especially in clay. Add perlite (about 10 to 20% by volume) for aeration. Avoid adding sand to clay unless you are prepared for a major, labor-intensive restructuring, because small sand additions can worsen drainage by filling clay pore spaces.
How long should I wait before re-testing soil after changing pH?
Retest after 4 to 6 weeks. pH adjustments made with limestone, sulfur, or acidifying fertilizers take time to react, so adding more before the soil has stabilized can overshoot your target and cause new nutrient availability problems.
Do I need a full lab soil test, or is a DIY kit enough for flower beds?
DIY kits are useful for screening extremes, especially when you suspect acidity. For beds where you’ll invest heavily, a local lab test is more decisive because it gives nutrient levels (not just pH). If you’re only unsure about drainage and structure, invest effort in percolation and texture checks instead of buying multiple pH kits.
Is “6.5 works for everything” a safe rule for flowers?
No. Many species tolerate a range, but many also have narrower needs. If a specific variety struggles despite proper watering and feeding, check pH first because nutrient lockup from being too high or too low can mimic deficiency symptoms.
How can I tell if my problem is nutrient deficiency versus nutrient lockout?
If you’re regularly fertilizing and still see yellowing or weak growth, check pH before adding more fertilizer. Lockout often looks like deficiency, but adding more nutrients without fixing pH can increase salts and make symptoms worse. A soil test is the fastest way to confirm.
What should I do if my bulbs rot even though the soil is “not that wet”?
Bulb rot is usually a drainage issue, even when the surface looks fine. Use sharp drainage measures, such as raised beds or very well-amended soil with adequate coarse material, and verify with a percolation test. Bulbs are especially sensitive to standing water during winter and early spring.
Can over-fertilizing be mistaken for a soil problem?
Yes. Excess nitrogen can reduce flowering in many perennials, producing lots of soft growth with fewer blooms. If plants are lush but not flowering, check fertilizer type and rate, then verify soil pH so you do not compound the issue by adding more nutrients.
How often should container flowers be fertilized with soilless mix?
Expect ongoing feeding. Soilless media have low capacity to hold nutrients, and frequent watering leaches what’s available. A practical approach is to start regular feeding 2 to 6 weeks after planting and then continue about every 1 to 2 weeks during the growing season, adjusting based on growth and watering frequency.
Why is using native garden soil in pots so risky?
Native or in-ground soil compacts quickly in containers, which reduces oxygen in the root zone and can cause waterlogging within a season. Use a true soilless potting mix (with perlite and appropriate components) and ensure drainage holes are present, because container drainage is non-negotiable.
What’s a fast DIY option to identify clay versus sand versus silt before amending?
Run the jar texture test. Shake soil with water in a jar, then let it settle 24 to 48 hours. Sand settles first, silt ends up in the middle, clay stays suspended longest. The layer proportions help you choose whether compost plus perlite, raised beds, or a different strategy makes sense.
If my garden is on a slope, should I test soil drainage differently?
Yes. Drainage can vary dramatically across a slope because water flows downhill. Test multiple holes along the bed and at different elevations, then amend the worst-performing spots. This reduces the chance that you fix “the average” but plant into a low-draining pocket.
Is coco coir only for hydroponics, or can I use it in containers?
Coco coir can work as a transition media in containers because it behaves more like soil than many other soilless options and buffers pH reasonably well. If you use coco, plan on using a complete nutrient solution that includes calcium and magnesium, since coco can bind those elements.